How to Organize Your Beauty Products So You Can Actually Find Everything and Enjoy Getting Ready
A disorganized beauty collection creates a specific kind of daily friction — the mascara that takes three minutes to locate, the foundation bottle that’s fallen behind everything else, the expired products taking up space that useful things should occupy. Multiply that friction across every morning and it adds up to a meaningful amount of daily stress over something that should feel enjoyable.
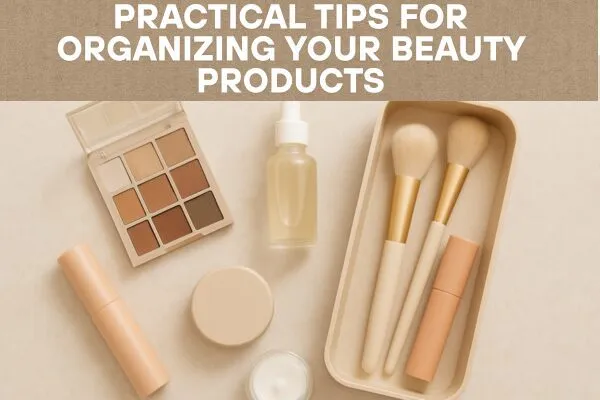
The goal of good beauty organization isn’t aesthetic — though a well-organized vanity absolutely looks beautiful. The goal is a system where your daily routine flows smoothly, where everything you need is immediately accessible, and where the occasional product hunt is eliminated entirely. Here’s how to build that system from the ground up.
Step 1: Declutter Before You Organize Anything
This step is non-negotiable, and it has to come first. Organizing a cluttered collection produces a tidy-looking cluttered collection — the same inefficiency, arranged more attractively. The actual solution starts with reduction.
Pull everything out of your current storage completely. Every drawer, every shelf, every bag. Spread it on a flat surface where you can see all of it at once.
Then go through it with three questions:
Have I used this in the last six months? If not, it’s taking up space that a product you actually use deserves.
Is this expired? Most beauty products have a period-after-opening symbol — a jar with a number and M — indicating how many months the product is safe after opening. Foundation, mascara, and liquid eyeliner in particular go bad faster than most people expect. Old mascara is a genuine eye infection risk. Toss anything that’s past its safe use date.
Do I have something that does the same job better? Duplicate products accumulate without intention. Three nearly identical nude lipsticks, two similar setting powders, four mascaras at varying stages of empty. Keep the one you reach for. Donate or discard the others.
What remains after this process should be a collection you genuinely use, enjoy, and can justify the space for.
Step 2: Group Everything by Category
Once the collection is reduced to what should stay, organize it into logical categories. The categories that make most intuitive sense for most people:
Daily skincare — cleansers, toners, serums, moisturizers, SPF. These are used in a specific sequence every day and benefit from being together in usage order.
Makeup — further divided if your collection is large. Foundation and base products together, eye products together, lip products together, setting products together. The sub-grouping doesn’t need to be elaborate — it just needs to reflect how you actually reach for things.
Haircare — shampoos, conditioners, treatments, and styling products. These typically live in the shower or nearby rather than at a vanity, but grouping them together within that space matters.
Tools — brushes, sponges, eyelash curlers, tweezers, and anything used to apply other products. These deserve their own designated space separate from the products themselves.
Nail care — polish, base coats, top coats, files, and tools.
Fragrance — perfumes and body sprays, kept together away from direct light and heat which degrade fragrance quality.
The specific categories that make sense depend on your collection’s size and composition. The principle is that any product should have an obvious home within your system — a category it unambiguously belongs to.
Step 3: Choose Storage That Makes Everything Visible
The single biggest improvement most people can make to their beauty organization is switching to clear storage. The problem with opaque containers, cluttered drawers, and closed bags isn’t that they’re aesthetically wrong — it’s that they hide what’s inside. Hidden products get forgotten, duplicated, and expired.
Acrylic drawers are the most popular clear storage solution for vanities. Stackable acrylic drawer units work particularly well for makeup because products stay visible at a glance and drawers keep items categorized without requiring significant counter space.
Clear bins and trays work well for skincare products, which tend to be taller and less stackable than makeup. A tray with clear individual compartments or even a simple clear bin keeps skincare products visible and accessible without requiring opening and closing drawers.
Glass jars and clear cups for brushes and tools keep them upright, visible, and easy to grab individually without displacing everything else.
When arranging within any storage container, apply a simple rule: most-used items in front, least-used items in back. Your daily moisturizer should be the first thing your hand reaches. The face mask you use once a month can live behind it.
Step 4: Use Vertical Space Instead of Spreading Horizontally
Bathroom counters and vanity surfaces are almost always limited. The solution isn’t more surface area — it’s using the vertical space above the surface that most organizational systems ignore entirely.
Tiered trays work beautifully for perfume or frequently used skincare. A three-tier tray takes the footprint of a single tier but gives you triple the storage, with every product visible from a slight distance.
Stackable drawer units maximize vertical storage for makeup. A four or five drawer unit takes minimal counter space while holding a significant collection.
Wall-mounted organizers — adhesive hooks for tools, magnetic strips for metal implements, wall-mounted shelving — use wall space that otherwise contributes nothing to the organization system.
Inside cabinet door organizers are consistently underused. A clear pocket organizer mounted inside a bathroom cabinet door holds small items that would otherwise crowd the cabinet shelves.
Step 5: Give Tools Their Own Dedicated Space
Makeup brushes, sponges, eyelash curlers, tweezers, and similar tools have organizational needs that differ from product storage. They need to be accessible quickly, ideally upright for brushes, and kept hygienically separate from products.
Brush holders — ceramic cups, glass jars, or purpose-made brush holders — keep brushes upright and immediately accessible. Multiple smaller containers divided by brush type (face, eye, lip) make the brush you need easy to identify and retrieve without displacing others.
Sponges benefit from their own space, preferably somewhere they can dry completely between uses. A small open container or a dedicated compartment in a tray prevents the bacterial growth that a sealed, damp environment encourages.
Smaller tools — tweezers, eyelash curlers, nail tools — work well in a small divided tray or a cup of their own. Keeping them together prevents the common frustration of searching through makeup for tweezers.
Step 6: Create a Dedicated Space for Daily Essentials
Regardless of how the full collection is organized, your most-used daily products deserve the most accessible, prime-position space in the system. These are the products you reach for every single morning — daily cleanser, moisturizer, SPF, foundation, mascara, whatever your non-negotiable everyday products are.
Keeping daily essentials in a separate, easily accessible spot — a small tray on the counter, a single drawer at eye level, the front row of a tiered organizer — eliminates most of the daily friction that a disorganized collection creates. You don’t need to navigate the full system every morning. Your daily routine lives in one specific, immediately accessible place.
This is especially valuable if counter space is shared. A designated tray for daily essentials creates a system that doesn’t require the entire collection to be perfectly maintained every day to function well.
Step 7: Maintain the System With Minimal Daily Effort
An organizational system that requires significant daily effort won’t be maintained. The maintenance habits that keep a beauty organization system functional over time should each take less than sixty seconds individually.
Return products to their designated spot after each use. This is the habit that does most of the maintenance work. A product that goes back to its place immediately after use never contributes to counter creep or category confusion.
Wipe storage containers monthly. Acrylic drawers and clear trays collect product residue and dust. A quick wipe with a damp cloth takes two minutes and keeps the storage looking as good as it functions.
Reassess the collection every three to six months. Products expire, routines change, and favorites are replaced. A brief seasonal review — the same declutter questions applied to whatever has accumulated — keeps the collection current and the storage adequate.
Keep disposal convenient. A small recycling bin near the vanity for empty packaging removes the friction of walking to a bin in another room. Empty products that sit on surfaces contribute to clutter even after their useful life is over.
Final Thoughts
An organized beauty collection isn’t about having a certain amount of products or a specific type of storage. It’s about having a system where every product has a home, where daily use items are immediately accessible, where nothing expires unnoticed, and where getting ready in the morning is a smooth experience rather than a search operation.
The steps above build that system progressively: reduce first, then categorize, then choose storage that makes everything visible, then maintain with minimal daily habits. Each step produces immediate improvement, and the cumulative effect is a beauty routine that feels genuinely effortless.
Start with the declutter. Everything else is easier once you’re only organizing what genuinely deserves to stay.