How to Make Your Manicure Last Longer: Everything That Actually Works
A manicure that chips on day two is not just aesthetically frustrating — it is a sign that something in the preparation, application, or aftercare process was not quite right. And the maddening thing is that it often has nothing to do with the quality of the polish.
The longevity of a manicure is determined by a chain of decisions that starts before the first drop of color is applied and extends into the daily habits of the following week. Skip any link in that chain and the result is a manicure that chips earlier than it should, regardless of how expensive the polish is or how carefully the color was applied.
This guide covers every factor that actually influences how long a manicure lasts — in the right order, with the right amount of detail to understand not just what to do but why it works. Apply these consistently and the difference is genuinely dramatic.
Why Manicures Chip Early — The Real Causes
Before the steps, understanding the actual mechanisms of manicure failure makes every subsequent decision more intuitive.
Adhesion failure at the nail surface. Polish does not bond chemically to a contaminated surface. Oil, moisture, product residue, or even the oils transferred from your fingertips after prep all prevent proper adhesion between the polish and the nail. This is the most common cause of early lifting and chipping — the bond was compromised before the first coat was applied.
Mechanical stress at the free edge. The tip of the nail absorbs the most impact and friction in daily use — typing, opening packaging, picking up objects, washing hands. If the free edge is not sealed, the polish at the tip begins to lift and wear inward from the edge. This is the characteristic progression of tip chipping.
Layers that are too thick. Thick coats of polish dry from the outside in, leaving the interior layers soft for longer. This creates a surface that looks dry but is actually still curing underneath, making it vulnerable to denting and smudging. Thick layers also create more internal stress as they finally dry and contract.
Water exposure before the polish has fully cured. Polish takes longer to fully cure than it takes to become touch-dry. Washing hands, showering, or doing dishes within the first hour of application — even after the nails feel dry to the touch — can compromise the adhesion of the freshly applied layers.
Dehydrated nails. Brittle, dry nail plates flex more under stress and hold polish less effectively than well-hydrated ones. Long-term nail health directly affects manicure longevity.
Every step in this guide addresses one or more of these causes directly.
Step 1: Start With Perfectly Clean, Dry Nails
The first and highest-impact step in manicure longevity happens before any product touches the nail. A nail surface that is clean, dry, and oil-free is the non-negotiable foundation of everything that follows.
Remove any old polish with a saturated cotton pad, pressing it against each nail for five to ten seconds before wiping — this dwell time allows the remover to dissolve the polish rather than simply smearing it. For stubborn glitter or dark colors, use a foil wrap: press a soaked cotton ball against the nail, wrap in a small piece of aluminum foil, and leave for two to three minutes. The polish will lift away cleanly.
After removing polish, wipe each nail once more with a fresh cotton pad to clear any remaining residue. You should see no color transfer before proceeding.
Wash hands with soap and water and dry completely. Nail plates absorb water and expand slightly when wet — applying polish to a hydrated nail means the polish is applied to a slightly expanded surface that then contracts as it dries, creating micro-tension at the bond. Wait five to ten minutes after washing before beginning polish application.
The final and most critical cleaning step: wipe each nail surface firmly with a lint-free pad soaked in isopropyl alcohol (70% or higher) or a dedicated nail dehydrator. This removes the natural skin oils that transfer to the nail surface during all the preceding steps, plus any remaining residue. Use a fresh section of the pad for each nail to avoid re-depositing what you are removing.
After this step, do not touch the nail surfaces. The oils on your fingertips will immediately contaminate the cleaned surface. Handle nails by the sides only.
Step 2: Prepare the Nails Properly
Clean nails are necessary but not sufficient. Proper shaping and light surface prep create the physical conditions for maximum polish adhesion.
Shape before polish, not after. Filing after polish is applied stresses the fresh color and creates micro-cracks at the free edge. Shape and length should be finalized before any product is applied.
File with a fine-grit file (240 grit for natural nails) in one direction only — from the side edge toward the center. The back-and-forth sawing motion creates microscopic fractures at the nail edge through heat and opposing stress. One-directional filing takes slightly longer but produces a stronger, smoother free edge that holds polish better.
Choose a shape that suits both your style and your lifestyle. Rounded, oval, almond, and squoval (square with softened corners) are more resistant to chipping than sharp square corners, which bear impact without curved structural support. If chipping consistently starts at the corners of your nails, rounding them slightly will produce an immediate improvement.
Buff lightly. A soft buffer used gently across the nail surface creates a slight texture that improves mechanical adhesion — the polish has microscopic surface variations to grip. Buff until the surface appears uniformly matte with no shiny spots. Keep this step to fifteen to thirty seconds per nail; over-buffing thins the nail plate and counterproductively weakens it. If your nails are already thin or flexible, skip buffing entirely.
Push back cuticles. Cuticles sitting on the nail plate prevent polish from adhering at the base and create a natural lifting point. After the warm water or cuticle oil softening, use a cuticle pusher to ease cuticles back gently. Do not cut — the cuticle is a protective seal. Remove any visible dead skin on the nail plate surface with light buffing or a cuticle remover product.
Step 3: Apply a Base Coat — Every Single Time
The base coat is the element most responsible for manicure longevity, and it is the one most frequently skipped by home manicurists. This is the single most impactful change most people can make to extend their manicure life.
A quality base coat contains bonding agents that create a genuine chemical bridge between the nail’s keratin surface and the color polish. Without it, color polish is adhering to a surface it was not specifically formulated to bond with. With it, the base coat bonds to both the nail and the color, creating a system that is dramatically more durable than color alone.
Base coats also prevent pigment staining of the natural nail (particularly relevant with dark colors and reds), fill minor surface ridges for a smoother color application, and in many formulations include strengthening or conditioning ingredients that support nail health during wear.
Apply one thin, even layer from just above the cuticle to the free edge. Seal the free edge by running the brush lightly across the very tip — this seals the most vulnerable point of the nail from the foundation layer up. Allow to dry completely before applying color. Rushing this step compromises the adhesion of the entire manicure.
For gel polish, cure the gel base coat under a UV or LED lamp for the full manufacturer-specified time. Under-curing is one of the most common causes of gel lifting.
Step 4: Apply Color in Thin, Even Layers
The application of color is where most people focus their attention, and proper technique here does genuinely matter — but it matters in a specific, often counterintuitive way. The goal is thin layers, not thick ones.
Thin coats of color dry faster, level more evenly, create less internal stress as they cure, and produce a more durable final surface than thick coats. Two or three thin coats outperform one thick coat on every longevity measure.
Load the brush with a moderate amount of product and apply in three strokes per nail: one down the center, one down each side. The brush should glide with light pressure — pressing the brush flat drags the polish rather than flowing it onto the nail.
Allow sixty to ninety seconds between coats for regular polish — not until it looks dry, but for a full minute that allows the underlying layer to set properly before the next is applied. This matters because polish applied over a layer that has not yet set creates adhesion problems between the layers themselves.
Seal the free edge with each color coat: a light pass of the brush across the very tip of the nail takes two seconds and is one of the highest-impact longevity techniques available. Every color coat should include this step.
For gel polish, cure each layer fully under the lamp. Partial curing of gel layers creates a soft interior that does not bond properly with subsequent layers.
Step 5: Cap the Free Edge — the Professional Technique That Makes the Biggest Difference
This step deserves its own section because it is the technique most consistently used by professional manicurists, most consistently missing from home manicure routines, and most directly responsible for preventing the most common form of manicure failure: tip chipping.
Capping the free edge means brushing a thin line of product across the very tip of the nail — the absolute edge — with each coat of base coat, color, and top coat. The brush should angle slightly under the free edge to catch the underside of the nail tip as well as the surface.
What this does: it seals the most exposed and most mechanically stressed point of the manicure. Every time the nail contacts a surface — typing, opening packaging, handling objects — the very tip of the nail is where the impact concentrates. An unsealed free edge is an open invitation for chips to begin at the tip and work backward into the color.
Capped free edges extend the life of most manicures by two to four days compared to the same manicure without capping. It is the technique change with the highest longevity return for the smallest time investment.
Step 6: Apply a Quality Top Coat and Maintain It
A good top coat serves multiple functions: it adds a protective, harder-than-color-polish surface layer that resists abrasion, it adds the glossy finish that makes nails look salon-done, and it seals the color below from environmental exposure.
Apply one smooth, even layer of top coat over fully dried color, sealing the free edge as with every previous coat. High-quality top coats designed specifically for longevity (look for formulas containing UV absorbers and flexible polymers) outperform standard formulas meaningfully — this is one area where product quality genuinely matters.
For gel polish, cure the top coat fully and wipe any uncured residue with a lint-free pad and gel cleanser. Gel top coats that are under-cured remain tacky and do not provide the protective surface they are designed to.
The top coat refresh is the most underused manicure longevity strategy. Every two to three days, apply a thin fresh layer of top coat over the existing manicure. This adds a new protective surface, restores shine that has dulled from washing and handling, and — critically — reseals the free edge that wears most quickly. A two-minute top coat refresh can extend a regular polish manicure by three to five additional days and keeps the nails looking freshly done throughout that extended period.
Step 7: Protect the Manicure in the Days After Application
The twenty-four to forty-eight hours immediately after a manicure are the most vulnerable period — the polish looks and feels dry but has not reached full hardness, and the bond is still developing. Activities during this window have an outsized impact on longevity.
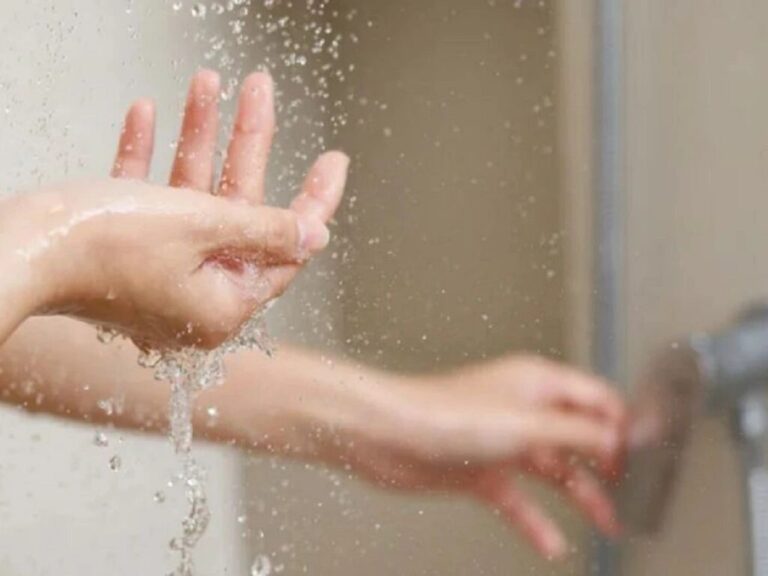
Avoid hot water for the first hour minimum. Showering, washing dishes, or any prolonged hot water exposure in the first hour after polish application can cause bubbling, lifting, and compromised adhesion. If possible, wait two to three hours.
Wear gloves for dishwashing and cleaning. Water exposure is the manicure’s primary ongoing enemy. Hot water and detergent in particular accelerate polish wear and lift the free edge. A pair of rubber or vinyl gloves kept at the sink takes three seconds to put on and significantly extends manicure life. This is one of the highest-impact ongoing habits available.
Apply cuticle oil daily. Daily cuticle oil application maintains the hydration of the nail plate and surrounding skin, which directly supports the bond between the polish and the nail. It also prevents the dry, ragged cuticles that can catch on and lift the edges of polish. A thirty-second application each evening is sufficient.
Avoid using nails as tools. Using nails to pry, scrape, open packaging, or perform any task that applies lateral force to the free edge is one of the fastest routes to a chip. This habit is so common it is almost automatic for most people — catching and changing it produces an immediate difference in manicure longevity.
Moisturize hands regularly, but time it wisely. Hand cream is excellent for skin and nail health but should not be applied immediately before any nail handling — the oils transfer to the nail surface. Apply hand cream immediately after situations where oil transfer does not matter and use it generously and consistently.
The Color Choices That Make Longevity Easier
Color selection affects perceived longevity even when actual longevity is identical. Some shades reveal wear, growth, and chips dramatically earlier than others.
Sheers and nudes are the most forgiving colors available. A small chip in a barely-there pink is essentially invisible at a glance. The same chip in dark red is obvious. For the busiest periods when nail maintenance will be minimal, a beautiful nude is the most practical choice without being boring.
Muted and dusty tones show less wear than saturated brights. Dusty rose, muted mauve, and soft terracotta all hold up visually better than vivid versions of similar colors.
French tips concentrate color at the free edge where chips begin, but the narrow line means tip wear is far less visible than with full-coverage color. They also remain polished-looking through significant nail growth.
Dark colors require flawless application and the most diligent maintenance because every flaw — chip, bubble, brush stroke — is maximally visible. They look extraordinary done well but require the most attention to technique and care.
Extra Factors That Affect How Long Your Manicure Lasts
Nail health. Healthy, well-hydrated nail plates hold polish better than brittle, dry ones. Consistent cuticle oil use and biotin supplementation (if deficiency is a factor) improve the structural quality of the nail over time, producing a better foundation for any manicure.
Environmental conditions. Dry, cold air dehydrates the nail plate and surrounding skin. Frequent hand washing — more common in winter and for certain professions — accelerates wear. Adjusting expectations and care routines for these conditions rather than applying the same approach year-round produces more consistent results.
Product freshness. Polish that has thickened, separated, or been stored poorly does not apply or adhere as well as fresh polish. Adding a few drops of nail polish thinner (not remover) restores consistency; a polish that no longer mixes smoothly despite thinning is past its effective life.
Lamp quality for gel. A UV or LED lamp that is past its effective lamp life under-cures gel layers even when the timer runs the full specified time, producing manicures that lift and chip far earlier than they should. LED lamps typically last longer than UV bulbs before requiring replacement.
Final Thoughts
A long-lasting manicure is the outcome of a system, not a single technique or a single product. The chain runs from the initial surface cleaning through the base coat application, the thin color layers, the free-edge sealing, the top coat, and into the daily habits that maintain the bond over the following week.
Every link in that chain matters. Clean, dehydrated nail surfaces. Thin layers. Capped free edges. Fresh top coat every two to three days. Gloves for water exposure. Daily cuticle oil. These are the elements that separate a manicure that lasts three days from one that lasts ten to fourteen.
Apply them consistently, understand why each one matters, and you will find that long-lasting nails stop being something that happens in professional salons and starts being a regular outcome of your own home routine.
Why does my nail polish always chip at the tips within a day or two?
Tip chipping is almost always caused by not sealing the free edge with each coat of base coat, color, and top coat. The free edge is the highest-stress point of the nail — it contacts surfaces constantly during daily activities. A light brush across the very tip of the nail with each coat creates a sealed edge that resists this wear. Apply this technique consistently and tip chipping reduces dramatically within one or two manicures.
Does expensive polish really last longer than drugstore polish?
Not necessarily — price is not reliably correlated with longevity. Preparation, technique, and aftercare collectively have more influence on manicure longevity than the brand of polish used. A careful application of a drugstore color over properly prepped nails with a good base coat and top coat will outlast a rushed application of salon-brand polish by several days. That said, a quality base coat and top coat do make a meaningful difference — these are the products where investing in a better formula pays the clearest longevity dividend.
How can I make gel nails last longer without lifting?
Gel lifting is most commonly caused by one of three things: insufficient surface dehydration before the base coat (leaving oil or moisture on the nail), under-curing of any layer (including the base coat), or getting moisture under the free edge early in the wear period. Thorough dehydration with isopropyl alcohol before the base coat, full curing of every layer under a functioning lamp, and meticulous free-edge sealing with each coat address the three most common causes of gel lifting.
Is it better to do thin or thick coats of nail polish?
Thin coats consistently produce more durable manicures. Thin coats dry faster, bond better between layers, create less internal curing stress, and produce a harder final surface. Two or three thin coats always outperform one thick coat in terms of both appearance and longevity. If a single coat looks thin, the answer is a second thin coat after the first has set, not a thicker first coat.
How often should I apply cuticle oil for the best nail health?
Once daily is the minimum for meaningful benefit — before bed is the ideal time because the oil has hours to absorb without being immediately washed off. For nails that are currently very dry or recovering from gel removal or heavy product use, two to three applications daily for the first one to two weeks produces faster recovery. The format matters for consistency: a pen applicator or roll-on takes ten seconds per hand with no mess, making the habit far easier to maintain than a bottle with a brush.