How to Remove Gel Nails Without Acetone: Gentle Methods That Actually Work
Gel nails are one of the best things to happen to busy schedules — two to three weeks of chip-free, glossy color with no daily touch-ups. The removal process, however, is a different story. The standard acetone soak method gets the job done, but it does it by stripping everything — the gel, the natural oils in the nail plate, the moisture from the surrounding skin, and often a meaningful amount of the structural integrity of the nail itself if it is done too frequently or too aggressively.
If you have ever removed gel nails and been left with nails that are noticeably thinner, drier, more flexible, and more prone to breaking than before, you know exactly what acetone does at full strength. For women who do gel nails regularly, that cumulative dehydration effect becomes genuinely significant.
The good news is that acetone is not the only way to remove gel polish — it is simply the fastest and most chemical way. Gentler methods exist, they work, and they leave your nails in significantly better condition afterward. Here is everything you need to know about removing gel nails without acetone, including the method that suits your patience level, the aftercare that makes the difference, and the mistakes that cause most of the damage.
Why Skip Acetone?
Understanding what acetone actually does helps explain why gentler alternatives are worth the extra time.
Acetone is an organic solvent that breaks down the polymer chains in gel polish — it dissolves the cross-linked structure that makes gel hard and durable. It does this very effectively, but it also dissolves the natural oils and lipids in the nail plate and the surrounding skin with equal efficiency. These oils are the nail’s natural protection against brittleness and breakage.
Regular acetone exposure causes noticeable dehydration of the nail plate, which manifests as increased flexibility and bendiness in nails that should feel firm, visible peeling or layering at the surface of the nail, whitening and chalky appearance of the nail surface immediately after removal, dryness and roughness in the skin around the nail that can take days to resolve, and increased susceptibility to breaking and chipping in the weeks following removal.
For occasional gel removal, acetone’s effects are manageable with good aftercare. For women who do gel nails every two to three weeks, the cumulative dehydration can become chronic — nails that never fully recover their strength between applications. If this describes your current experience, switching to gentler removal methods will make a visible difference within a few cycles.
Method 1: Warm Water and Oil Soak
This is the gentlest and most nail-friendly method available — it uses nothing that will harm the nail or surrounding skin, and it simultaneously provides some conditioning benefit during the process.
What you will need:
- A bowl of warm (not hot) water
- Cuticle oil or a few drops of olive oil, coconut oil, or any lightweight oil
- A cuticle pusher or orangewood stick
- A soft nail buffer
- One teaspoon of dish soap (optional but helpful)
The process:
Start by filing the shiny surface of the gel polish with a coarse nail file (180 grit works well). This step is important — the gel’s sealed surface prevents water from reaching the bond layer, and breaking through the surface dramatically accelerates the loosening process. File lightly and evenly across the entire nail surface until the shine is gone and the surface looks matte and slightly scratched. Avoid filing too deeply — you want to break through the top coat and color layers, not remove nail plate.
Add a few drops of oil to a bowl of warm water along with the dish soap if using. The oil helps condition the nail during the process and the dish soap assists with breaking down the gel bond. Submerge your fingers and soak for fifteen to twenty minutes, maintaining the warmth by topping up with warm water as it cools.
After soaking, check whether the edges of the gel have begun to lift. Gently use a cuticle pusher or orangewood stick to ease the gel away from the nail, starting at the edges and working toward the center. Do not force or pry — if the gel is not lifting easily, soak for another five to ten minutes. Forcing gel off before it is ready is the primary cause of nail damage in any removal method.
Repeat until the gel is fully removed. This method typically takes thirty to forty minutes total and works best on thinner gel formulas and older gel that has already seen some lifting at the edges.
Method 2: The Nail Buffer Technique
The buffing method is the most mechanical approach — it removes the gel through physical abrasion rather than chemical dissolving. It requires the most patience but is the most consistently available method since it requires nothing beyond a nail file and buffer.
What you will need:
- A coarse nail file (150 to 180 grit)
- A medium nail file (240 grit)
- A soft nail buffer
- Cuticle oil
The process:
Using the coarse file, begin filing the gel surface with gentle, even strokes. The goal is to file through the gel layers — top coat, color coat, and base coat — without reaching the natural nail. This distinction is critical: the gel layers look slightly different from the natural nail below them (usually slightly more opaque, with a different sheen), and you are aiming to stop filing when you reach that transition.
Keep filing with light pressure, checking your progress every thirty seconds. The gel will file away as a slightly powdery substance. As you get closer to the natural nail, switch to the medium file for finer removal, then to the soft buffer once only the thinnest residue remains.
The buffing method requires the most care around the edges and the free edge of the nail — these are the areas where it is easiest to accidentally file into the natural nail plate. Work slowly and check frequently.
Apply cuticle oil generously once the gel is fully removed to replace any moisture lost during the mechanical buffing process.
This method works best for thin gel polish coats. Thick builder gel, polygel, or hard gel extensions are not suitable for this approach — the volume of material to remove is too great for safe manual buffing.
Method 3: Acetone-Free Gel Removal Kits
The market for acetone-free nail removal has grown significantly in recent years, and quality acetone-free removal products are now widely available. These typically contain a combination of ethyl acetate (a gentler solvent than acetone), isopropyl alcohol, and conditioning ingredients like vitamin E or plant oils that partially offset the drying effects of the solvent.
These products remove gel more effectively and faster than the water soak method while being meaningfully less harsh than pure acetone. They are particularly useful for thicker gel formulas that do not respond well to the warm water soak.
How to use:
Begin by filing the surface of the gel with a coarse file to break the seal, as described in Method 1. Apply the acetone-free remover to a cotton pad or use the soaking clips or wraps included in the kit. Secure the soaked cotton against each nail and leave for ten to fifteen minutes, checking periodically for lifting.
Use the included tool or an orangewood stick to gently push the softened gel away from the nail, working from the edges inward. If resistance is encountered, resoak rather than forcing.
When selecting an acetone-free kit, look specifically for the acetone-free label — many “nail removal kits” still contain acetone as their primary active ingredient. Products labeled as “nourishing” or “gentle formula” are typically the acetone-free versions.
Method 4: The Dental Floss Method (For Slightly Lifted Gel)
If the edges of your gel have already begun to lift naturally — which often happens toward the end of a two to three week wear period — a piece of dental floss or a thin strand of thread can be used to gently work under the lifted edge and separate the gel from the nail.
This method should only be used when there is already visible, natural lifting at the edge. Attempting to create lifting that is not already present will damage the nail surface.
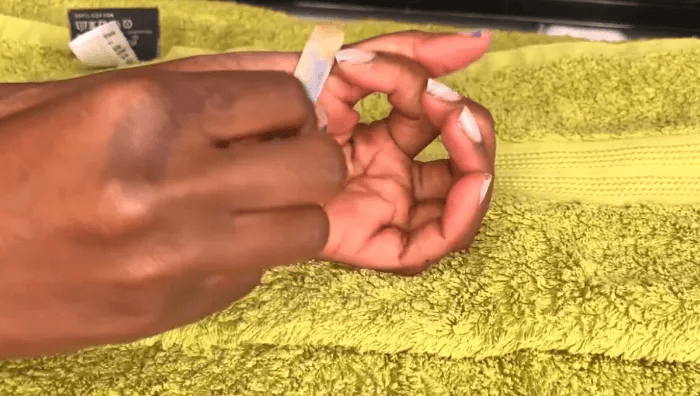
Slide the dental floss under the naturally lifted edge and gently saw back and forth in a shallow, careful motion, working the floss gradually further under the gel. The gel should release cleanly if it is already properly lifted. If you encounter resistance at any point, stop and return to one of the soaking methods to loosen further before trying again.
This method works best in combination with a preceding soak — fifteen minutes in warm water or with an acetone-free remover reduces the adhesion enough that the dental floss method removes the remaining gel cleanly and quickly.
Method 5: Prevention — Peel-Off Base Coat for Future Applications
If you have not yet applied your current gel but are concerned about removal harshness, a peel-off base coat applied before the gel prevents the direct bonding of gel to the natural nail surface. When removal time comes, the gel lifts away cleanly by peeling rather than requiring any solvent or significant mechanical abrasion.
This approach does have a trade-off: peel-off base coats produce a manicure that is less durable than a standard gel base coat. The gel is more prone to lifting and peeling during the wear period, particularly around the edges and tips. For women whose priority is easy removal over maximum longevity, this is an acceptable compromise. For women who rely on gel for its durability, the reduced wear life may not be worth it.
Peel-off base coats are widely available in both standard polish and gel-compatible formulas. The gel-compatible versions (sometimes labeled “gel peel base”) allow you to use them with a standard gel top coat and UV cure, maintaining the gel surface finish while using the peel-off foundation.
Aftercare: The Step That Most People Skip
Gel removal — even with the gentlest method — leaves the nail plate in a slightly compromised state compared to its pre-removal condition. The nail has been exposed to filing, soaking, and product contact, and the surface is more porous and more susceptible to moisture loss and mechanical damage in the hours immediately following removal.
The aftercare steps taken immediately after removal determine how quickly your nails recover and how they look and feel in the days that follow.
Buff the surface gently. After any removal method, the nail surface will have minor roughness or residue. A gentle once-over with a soft four-way buffer smooths the surface without removing additional nail plate and prepares it for products to absorb effectively.
Apply cuticle oil generously and immediately. This is the most important single step. Apply cuticle oil to each nail and the surrounding cuticle, massage in thoroughly, and ideally repeat two to three times in the hours following removal. The oil replenishes the lipids that soaking and filing have depleted and begins the recovery of the nail’s natural flexibility and moisture balance.
Apply a nail strengthener or treatment. A protein-based nail strengthener or a keratin treatment applied after gel removal supports the nail plate’s recovery and provides a protective layer. If you plan to apply new gel immediately, use a hydrating prep coat or nail primer specifically designed to be used before gel. If you are giving your nails a break, a nail strengthener used for a week or two before the next application produces noticeably better results.
Moisturize your hands. The skin around the nails is equally affected by the removal process. Apply a rich hand cream immediately after removal and continue daily moisturizing. The cuticle area in particular benefits from generous daily cuticle oil application during any post-gel recovery period.
Consider a break. If your nails are consistently thin, peeling, or fragile after gel removal, your nail plate may be telling you it needs a recovery period. Two to four weeks without gel — using a nail strengthener and daily cuticle oil instead — can restore a significant amount of structural health before the next application. This is particularly valuable if you have been doing gel continuously for many months.
The Most Common Removal Mistakes and How to Avoid Them
Peeling or prying gel off without proper preparation. This is the single most damaging thing you can do to your nails during gel removal. When gel is peeled off without being softened first, it takes layers of the natural nail plate with it — literally removing the top surface of the nail. The thinning and peeling that many women attribute to gel nails is actually caused by improper removal, not the gel itself. Always soak or file before attempting any lifting.
Filing too aggressively into the nail plate. The goal of surface filing is to break the seal of the top coat, not to remove the gel through filing alone. Pressing too hard or continuing to file once the gel layer is gone removes natural nail plate instead, thinning and weakening the nail significantly.
Rushing the soak time. Acetone-free methods require more time than acetone to loosen gel. If the gel is not releasing easily, the answer is always more soak time — not more force. Ten additional minutes of soaking is always preferable to five additional minutes of forcing.
Skipping aftercare. The removal process is only half the work. Nails left without moisture, oil, and strengthening treatment after gel removal take significantly longer to recover their normal condition and are more prone to breaking in the interim. The aftercare is not optional — it is half the maintenance equation.
Applying new gel immediately after removal without recovery time. Nails that are freshly removed from gel are in a temporarily weakened state. Applying new gel immediately, while the nail plate is still dehydrated and porous, produces worse adhesion and a less healthy foundation for the new application. Ideally, allow at least twenty-four hours and preferably forty-eight hours between removal and reapplication, using the intervening time for oil, strengthener, and hydration.
Final Thoughts
Acetone works, but it is not the only option — and for regular gel wearers, it is not the most nail-friendly option. The warm water soak, the buffing method, acetone-free remover kits, and the dental floss technique for naturally lifted gel are all genuinely effective approaches that leave your nails in meaningfully better condition than acetone does.
The key principle across every method is patience. Acetone-free removal takes longer, and the temptation to rush and force is the source of most nail damage during the process. Soak longer. File lighter. Push gently. Let the method do the work.
Your nails will thank you for the extra time in the form of stronger, less brittle, less dehydrated nail plates that hold gel more effectively and look healthier between applications.
Does removing gel nails without acetone actually work?
Yes — genuinely, though it requires more time than acetone. The warm water and oil soak method, acetone-free remover kits, and the buffing technique all effectively remove gel polish without acetone. The process typically takes twenty to forty minutes compared to acetone’s ten to fifteen, but the condition your nails are in afterward is noticeably better. For regular gel wearers especially, the extra time is a worthwhile trade for healthier nails.
What is the least damaging way to remove gel nails?
The warm water and oil soak method is the least chemically damaging approach because it uses nothing that dehydrates or damages the nail structure — water and oil are both genuinely conditioning during the process. The peel-off base coat approach (applied before the gel) is the least damaging of all removal scenarios because there is no bond to break and no solvent required. For gel that is already applied without a peel-off base, the warm water soak with thorough surface filing beforehand is the gentlest effective approach.
How long does it take to remove gel nails without acetone?
The warm water soak method typically takes thirty to forty minutes total including preparation and removal. Acetone-free remover kits typically take fifteen to twenty-five minutes. The buffing method takes the longest — forty-five to sixty minutes depending on the thickness of the gel — but requires no liquids and is available anywhere. All of these compare to ten to fifteen minutes with straight acetone, which is the primary trade-off of the gentler methods.
Can I remove gel nails without any tools at all?
Not effectively and not safely. At minimum, a nail file or emery board is necessary to break the sealed surface of the gel before any soaking method can work efficiently. Attempting to soak or lift gel off without breaking the surface seal first results in dramatically longer soak times and the temptation to peel or force, which damages the nail. A basic nail file is the one non-negotiable tool for any gel removal method.
How do I care for my nails after removing gel without acetone?
Apply cuticle oil generously immediately after removal and continue daily applications. Buff the surface gently with a soft four-way buffer to smooth any roughness. Apply a nail strengthener for one to two weeks before your next gel application if your nails feel thin or fragile. Moisturize your hands and cuticle area daily. If your nails are significantly compromised, consider a two to four week break from gel while using a strengthening treatment to allow the nail plate to recover fully before the next application.