How to Properly Prep Nails for Polish Longevity: The Complete Step-by-Step Guide
The most common reason a manicure chips within two or three days is not the polish formula. It is not the top coat. It is what happened — or more accurately, what did not happen — before the first drop of color was applied.
Nail preparation is the foundation that everything else builds on, and it is the step that most home manicures rush through or skip entirely. A perfect color application over improperly prepped nails will chip faster than a careful application over nails that have been properly cleaned, shaped, buffed, and primed. The prep work is not preliminary to the manicure — it is the most important part of it.
The good news is that proper nail prep is not complicated or time-consuming once you understand what each step is actually achieving and why skipping any one of them matters. Here is the complete, genuinely detailed guide to prepping nails for maximum polish longevity.
Why Nail Prep Makes Such a Difference to Longevity
Before the steps, understanding the mechanism helps explain why each one matters.
Polish adheres to the nail surface through a combination of mechanical bonding (the polish filling the microscopic texture of the nail surface) and chemical adhesion (the ingredients in the base coat bonding with the nail’s keratin structure). Anything that disrupts either of these bonding mechanisms — oil, moisture, dust, loose nail plate cells, product residue — creates a point of weakness where lifting and chipping begin.
The entire purpose of nail preparation is to eliminate those points of weakness systematically before any polish is applied. A nail that is clean, dry, lightly textured, properly shaped, and primed with a quality base coat gives polish the best possible foundation for maximum adhesion and longevity.
Step 1: Remove All Old Polish and Product Completely
This sounds obvious but deserves more attention than it typically receives. Old polish that has not been completely removed leaves a residue that prevents new polish from bonding directly with the nail surface. Even a thin, barely visible film of old color or top coat is enough to create adhesion problems.
Use an acetone-free remover for regular polish if your nails are dry or sensitive — acetone-free formulas are less dehydrating. For gel polish removal, acetone is necessary for effectiveness, but follow immediately with cuticle oil to replenish the moisture the acetone removes.
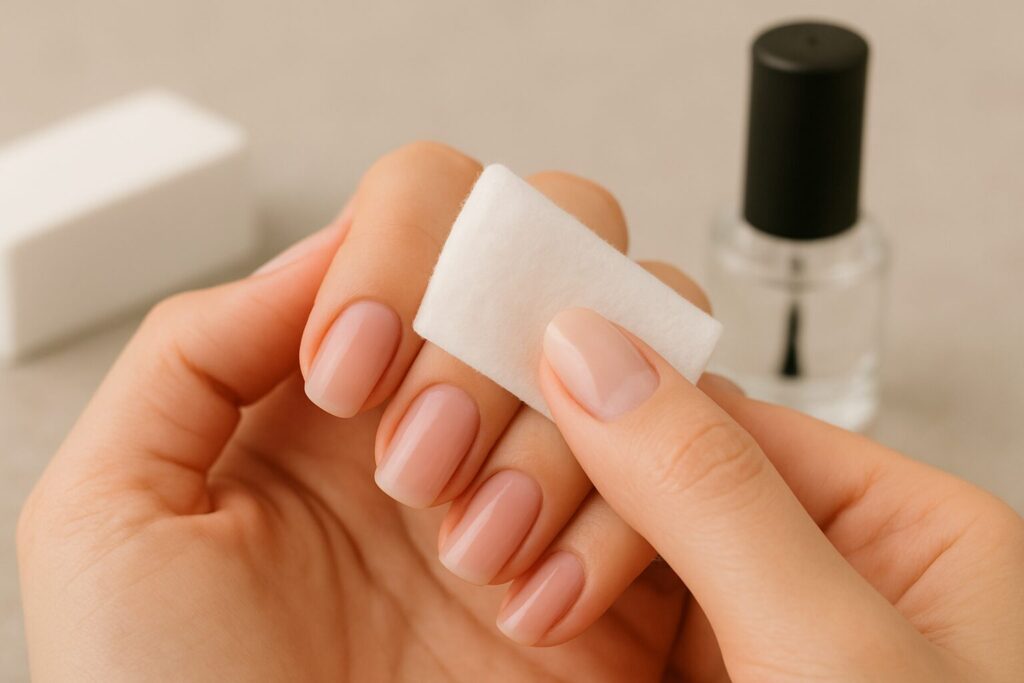
Saturate a cotton pad fully and press it against the nail for five to ten seconds before wiping — this dwell time allows the remover to dissolve the polish properly rather than simply smearing it across the nail. For stubborn glitter or dark colors, use a foil wrap method: press the soaked pad against the nail and wrap with a small piece of aluminum foil for two to three minutes. The polish will lift away cleanly rather than requiring repeated rubbing.
After removing polish, run a cotton pad soaked in remover over each nail one final time to ensure no residue remains. You should see zero color transfer on the pad before moving to the next step.
Step 2: Trim Nails to the Right Length for Your Shape
Trim nails before filing rather than trying to achieve significant length reduction through filing alone — filing to significantly reduce length creates heat and friction stress at the free edge and weakens the nail tip. A nail clipper or nail scissors removes length efficiently with a single clean cut.
Trim to slightly longer than your desired final length to give the filing step room to refine the shape without removing too much. If your nails are currently at the right length, skip the trimming and go directly to filing.
For longevity, the shape you choose matters. Rounded, oval, almond, and squoval (square with softened corners) are all stronger shapes than sharp square corners or very long pointed tips. The corners of a sharp square edge are the most common starting point for chips and cracks because they bear impact without the structural support of a curved shape. If your nails tend to chip frequently at the corners, rounding or softening them slightly will produce a noticeably longer-lasting result.
Step 3: File to Your Final Shape Using Correct Technique
A fine-grit nail file (240 grit is ideal for natural nails) is the right choice for shaping — coarser files create microscopic tears at the free edge that weaken the nail and make it more vulnerable to chipping. Use a glass nail file if you have one — they create the smoothest, most even edge finish and last indefinitely with cleaning.
The most important technique point: file in one direction only, from the side edge toward the center of the nail. The back-and-forth sawing motion that most people use creates microscopic fractures at the nail edge through the heat and opposing stress it produces. One-directional filing takes slightly longer but produces a significantly smoother, stronger edge.
File with light pressure. The nail file should be doing the work, not your arm. Heavy pressure creates more heat and more friction stress at the free edge.
After shaping the sides and tip, run the file very lightly under the free edge to remove any rough underside that could catch on fabric. This last step also removes a thin layer of potentially loose or poorly attached nail plate that could create a natural lifting point for the polish.
Step 4: Buff the Surface — Lightly and Specifically
Buffing serves two distinct purposes in nail prep: smoothing ridges that would show through polish, and creating a very slight surface texture that improves mechanical adhesion.
Use a soft four-way buffer or a fine-grit buffer block (200 to 240 grit). Work across the surface of each nail in light, even strokes until the surface looks uniformly matte with no shiny spots. The matte appearance tells you that the buffer has addressed the surface uniformly.
The most important caution in this step: less is more. Buffing removes layers of nail plate, and over-buffing progressively thins the nail, making it weaker and more flexible. A weekly buffing session as part of manicure prep should last approximately fifteen to thirty seconds per nail. If your nails are already thin or flexible, skip the buffing entirely — the adhesion benefit is not worth further thinning the nail plate.
A lightly buffed nail surface holds polish significantly better than an unbuffed shiny one because the microscopic texture created by buffing gives the polish physical purchase to grip. You will feel and see the difference in your polish longevity.
Step 5: Address Cuticles Before Cleaning
Cuticle care before polish application is important for longevity because cuticles that are sitting on the nail plate — rather than pushed back — give polish nothing to adhere to at the base of the nail. Polish applied over cuticle tissue that sits on the nail surface lifts immediately as the cuticle continues its natural growth and separation.
Soak fingertips in warm water for three to five minutes to soften the cuticles before attempting to push them back. Alternatively, apply a drop of cuticle oil or cuticle remover to each nail and allow two to three minutes for it to soften the tissue.
Using a cuticle pusher (metal or rubber tip) or an orangewood stick, gently push the cuticle back toward the nail fold in a smooth, curved motion following the natural curve of the nail. The goal is to reveal the nail plate at the base, not to remove cuticle tissue aggressively. Light pressure is sufficient.
Do not cut the cuticle — this is the sealed protective barrier between the nail fold and the nail plate. Cutting it creates an entry point for bacteria and can trigger reactive overgrowth that makes cuticle management more difficult over time. Push only.
If there is visible dead cuticle on the nail plate surface after pushing (a thin, whitish layer), a cuticle remover product or very light buffing will lift it. This residue on the nail surface creates a weak adhesion point if it is not removed before polish.
Apply cuticle oil and allow two to three minutes before wiping clean in the next step.
Step 6: Clean Nails Completely — This Is the Most Critical Step
This is the step that has the single largest impact on polish longevity and the step that most home manicures skip or underdo. No matter how perfectly shaped and buffed the nails are, any trace of oil, moisture, dust, or product residue on the nail surface at the moment of polish application will prevent proper adhesion.
Wash hands thoroughly with mild soap and warm water, scrubbing the nail surfaces. Dry completely — completely — with a clean towel. Nail plates absorb water temporarily when wet and expand slightly, then contract as they dry. Applying polish while the nail is still slightly hydrated means the polish is applied to a slightly expanded surface that then contracts as it dries, creating micro-tension at the bond and contributing to early chipping.
After drying, take a lint-free pad (not a cotton ball, which leaves fibers) soaked in isopropyl alcohol (70% or higher) or a dedicated nail cleanser/nail dehydrator, and wipe each nail surface firmly. One wipe per nail, using a clean section of the pad each time to avoid re-depositing residue.
This step removes the natural skin oils that transfer to the nail surface during the preceding steps, any remaining cuticle oil residue, any product residue, and any fine dust from filing and buffing. You will see a faint residue on the pad even after thorough washing — this is the level of cleaning that proper nail prep requires.
After this step, do not touch the nail surfaces with your fingertips. The oil on your skin will immediately contaminate the cleaned surface. Handle nails by the sides or use the pad for any final adjustments.
Step 7: Apply a Quality Base Coat — Never Skip This
The base coat is the chemical bridge between the nail plate and the color polish. Without it, color polish is adhering to a keratin surface that it was not specifically formulated to bond with. With it, the base coat bonds to both the nail surface and the color polish, creating a complete adhesion system that is dramatically more durable than color polish alone.
Base coats also serve several additional functions: they prevent the staining of the natural nail by dark or highly pigmented colors, they fill minor surface imperfections for a smoother color application, and many formulations include strengthening or conditioning ingredients that support nail health during the wear period.
Apply a thin, even layer from the base of the nail (just above the cuticle, not touching it) to the free edge, sealing the free edge tip by running the brush lightly across the very top. Sealing the free edge is the step that prevents the most common form of early chipping — tip wear that works backward from the edge into the color.
Allow the base coat to dry completely before applying color. Rushing this step means color is applied over a slightly wet base that has not yet set properly, creating a layering issue that compromises adhesion throughout the manicure.
For gel polish, cure the gel base coat fully under a UV or LED lamp for the manufacturer’s specified time. Under-cured gel base coat is one of the most common causes of gel lifting.
Step 8: Apply Color in Thin, Even Layers
The application technique after prep is the final factor in longevity. Thick coats of polish take longer to dry, remain soft and vulnerable for longer, and are more prone to denting and smudging. They also create more internal stress as the polish dries and contracts, contributing to earlier chipping.
Apply two thin coats of color rather than one thick coat. Thin coats level themselves more evenly, dry faster, and create a more durable final surface. Between coats, allow sixty to ninety seconds for regular polish to set slightly before applying the second coat.
Seal the free edge with each coat — color and top coat both — by running the brush lightly across the very tip of the nail. This free-edge sealing step is one of the highest-impact longevity techniques available and takes approximately two seconds per nail.
Step 9: Finish With a Quality Top Coat and Seal the Edges
A top coat provides the final protective layer — a harder, more abrasion-resistant surface than the color polish beneath it, and a seal that protects the color from chipping, fading, and UV damage.
Apply top coat over completely dried color (or immediately after curing for gel) in one smooth, even layer. Seal the free edge as with the base coat and color layers.
For regular polish, a top coat refresh every two to three days — applying a fresh thin layer over the existing manicure — adds a new protective surface and significantly extends the wear period. This two-minute maintenance step is one of the most effective longevity hacks available.
The Between-Manicure Habits That Compound Over Time
Polish longevity is also determined by habits between manicure sessions. The strongest prep in the world cannot fully counteract daily habits that aggressively damage the nail surface.
Daily cuticle oil. A thirty-second daily cuticle oil application maintains the flexibility and health of the nail plate, which directly affects how well it holds polish. Brittle, dehydrated nails do not hold polish as well as healthy, hydrated ones.
Gloves for water and chemical exposure. Water exposure causes the nail plate to expand and contract, which works against the bond between polish and nail over time. Rubber or vinyl gloves for dishwashing, cleaning, and prolonged water contact extend manicure life significantly.
Avoid using nails as tools. Using nails to pry, open, or scrape applies lateral force to the free edge that no base coat or top coat can fully resist. This habit is one of the most common causes of sudden chipping.
Consistent maintenance. Filing a small break or snag immediately prevents it from extending into a larger break. A small chip touched up with color and top coat on the same day it appears prevents it from spreading.
Final Thoughts
Long-lasting nails are primarily a preparation and technique outcome rather than a product outcome. The most expensive polish on poorly prepped nails will not last as long as a drugstore formula on properly prepped ones.
The complete prep sequence — full removal of old polish, trimming and shaping, light buffing, cuticle care, and thorough cleaning — creates a nail surface that is genuinely ready to hold polish. The base coat creates the chemical bridge. The thin color application and top coat complete the system. And the between-manicure habits maintain it.
Each step reinforces the others. The sequence works as a complete system, and understanding why each element matters makes it easier to follow consistently. Proper nail prep turns a manicure that lasts three days into one that lasts ten — and that difference compounds into significantly less time and money spent on repainting over the course of a month or a year.
What is the most important step in nail prep for longevity?
Cleaning the nail surface thoroughly with isopropyl alcohol or a nail dehydrator immediately before applying the base coat is the single highest-impact step. Oil on the nail surface is the most common cause of early polish lifting, and this step eliminates it completely. All the other preparation steps matter significantly, but none of them can compensate for a nail surface that still has oil on it when the base coat goes on.
Does buffing nails really help polish last longer?
Yes — light, careful buffing creates a slightly textured nail surface that provides mechanical grip for the polish, improving adhesion meaningfully. The important caveat is that over-buffing thins the nail plate, weakening it and actually reducing longevity because thinner nails flex more and create more stress at the polish bond. Fifteen to thirty seconds of light buffing per nail is beneficial; several minutes of aggressive buffing is damaging.
Why does my nail polish chip at the tips so quickly?
Tip chipping is almost always caused by not sealing the free edge. Every coat — base coat, color, and top coat — should include a light pass of the brush across the very tip of the nail to seal the edge. This prevents the most common point of entry for lifting and chipping. If you seal the free edge consistently, tip chipping reduces dramatically within one or two manicures.
How long should I wait between coats for the best result?
For regular polish: sixty to ninety seconds between the base coat and first color coat, sixty to ninety seconds between color coats, and two minutes after the final color coat before applying top coat. Rushing between coats means applying a new layer over one that has not set, which creates adhesion problems between layers and extends total drying time. For gel: follow the manufacturer’s specified cure time for each layer under the lamp — under-curing gel is the gel equivalent of rushing between regular polish coats.
Does the brand of base coat matter, or is any base coat sufficient?
The quality of the base coat matters meaningfully. A well-formulated base coat designed specifically for adhesion contains bonding agents that create a genuine chemical bridge between the nail and the color polish. A low-quality or old base coat that has thickened and separated does not perform this function effectively. Using a salon-quality base coat that is fresh and properly formulated is worth the investment — it is the element that most directly affects longevity. Ridge-filling base coats are particularly effective if your nails have significant surface texture.