How Long Should Acrylic Nails Really Last? (And How to Make Them Last Longer)
Acrylic nails are one of the most consistently popular nail services available for good reasons: they’re durable, customizable, capable of adding dramatic length instantly, and when properly maintained, they keep your hands looking polished for weeks at a time without daily effort. But if you’ve ever found yourself wondering whether your set is lasting as long as it should — or why one appointment produces nails that hold beautifully for three weeks while another has you back in the salon after ten days — you’re asking exactly the right question.
The lifespan of acrylic nails isn’t arbitrary. It’s determined by a specific combination of factors: the quality of the application, the products used, how fast your natural nails grow, and — critically — how you treat your hands and nails in the weeks after your appointment. Understanding these factors turns acrylic nail care from guesswork into a manageable routine that genuinely extends your set’s life.
This guide covers everything you need to know about how long acrylic nails last, what affects their lifespan, and exactly what to do — and avoid — to keep your set looking flawless as long as possible.
The Average Lifespan of Acrylic Nails
On average, acrylic nails need a fill every two to three weeks. This timeline is driven primarily by natural nail growth rather than the acrylic’s durability: as your natural nail grows out from the cuticle, a visible gap develops between the cuticle and the acrylic product. This gap — called “grow-out” or “lifting” at the base — is both aesthetically noticeable and potentially problematic, as moisture can accumulate in the space between the natural nail and the acrylic, creating conditions where bacteria or mold can develop.
The distinction between a fill and a full replacement is worth understanding:
A fill (also called an infill or backfill) involves adding fresh acrylic product to the gap at the base of the nail, reshaping and rebalancing the nail if needed, and re-sealing the surface with a fresh top coat. A fill preserves the existing acrylic overlay and is the standard maintenance appointment for nails that are lifting at the base but otherwise intact. Fills typically take 45 minutes to an hour and cost significantly less than a full new set.
A full replacement (removal and new set) is appropriate when the existing acrylic has significant damage, extensive lifting across multiple nails, structural problems that can’t be filled over, or when the natural nails need a break from acrylic product. Full replacements also allow the nail tech to reassess the health of the natural nail underneath and address any issues that have developed.
With consistent two-to-three-week fill appointments, a single acrylic set can technically be maintained indefinitely — many women keep their acrylic overlays for months at a time, simply getting fills. However, most nail technicians recommend a complete removal and fresh set every three to four months to allow the natural nail to be assessed and to ensure the acrylic product hasn’t developed any underlying issues.
Factors That Affect How Long Acrylic Nails Last
Not all acrylic sets perform equally, and the range is significant — some sets last four weeks without significant issues; others start lifting or breaking within a week. The following factors determine where your set falls on that spectrum.
1. Application Quality
The single most impactful factor in acrylic nail longevity is the quality of the initial application. A nail technician who properly preps the natural nail — removing all surface oils, lightly buffing the nail plate for adhesion, applying primer where needed, and applying the acrylic product in the right consistency and thickness — creates a bond that holds significantly longer than a rushed application.
The preparation stage specifically is where most longevity problems begin. If the natural nail plate has any residual oil, lotion, or moisture when the acrylic is applied, the bond is compromised from the first moment. This is why nail technicians use a dehydrator or nail prep product before any acrylic application — it removes the oil and moisture that would prevent adhesion.
If your acrylics consistently lift or fail earlier than expected, application quality is the first variable to examine. Different nail technicians at the same salon can produce dramatically different longevity results, which is why finding a skilled, experienced technician and booking specifically with them makes a significant practical difference.
2. Your Natural Nail Growth Rate
Because the visible gap between the acrylic and the cuticle is what drives the need for fills, how quickly your natural nails grow directly determines your fill frequency. The average nail growth rate is approximately 3 to 4 millimeters per month, but individual rates vary significantly based on age, nutrition, health status, and seasonal factors (nails grow faster in summer than in winter, and faster during pregnancy due to hormonal changes).
Women with faster-than-average nail growth may find they need fills every two weeks rather than the standard three weeks. Women with slower growth rates may comfortably stretch to three and a half or four weeks before a fill is needed. Tracking your own growth pattern over two or three fill cycles gives you a clear sense of your personal timeline.
3. Your Lifestyle and How You Use Your Hands
Acrylic nails are strong, but they’re designed to function as nails — not as tools. How you use your hands daily has an enormous impact on how long your set lasts.
High-impact hand use — typing intensively, heavy physical labor, frequent lifting or carrying, exercise that involves gripping equipment — puts repeated mechanical stress on the nails that can cause chips, cracks, or lifting at the free edge over time.
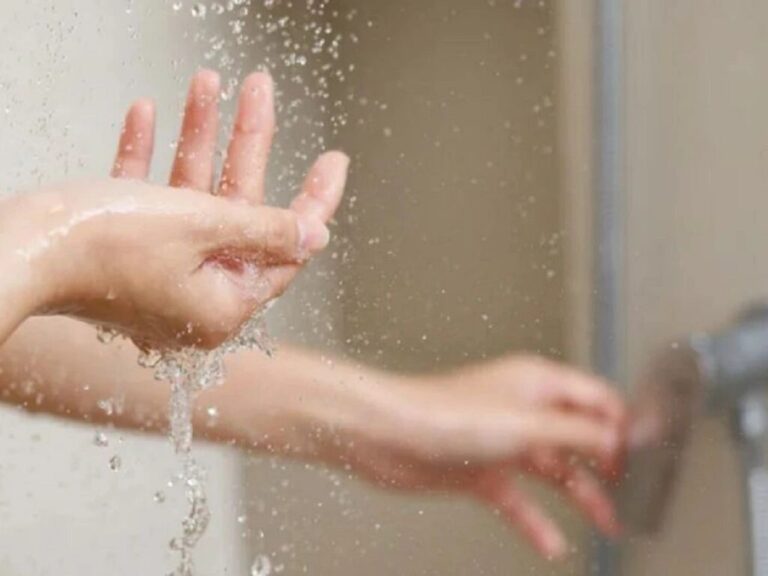
Chemical exposure is particularly damaging. Cleaning products, acetone-adjacent products, chlorine in swimming pools, and harsh soaps all weaken both the acrylic product itself and the bond between the acrylic and the natural nail. Prolonged water exposure in general — long soaks, frequent dishwashing without gloves — softens the acrylic over time and weakens the adhesion at the cuticle line.
Habits that stress individual nails — biting, picking at the edges, using nails as tools to pry or scrape — can cause sudden mechanical failure that shortens the lifespan of the affected nail or the whole set.
4. Aftercare Habits
What you do to your nails in the two to three weeks between salon appointments significantly affects how well the set holds. The specific habits detailed in the following section can meaningfully extend or shorten your acrylic set’s lifespan.
5. The Products and Technique Used
Different acrylic systems, monomer and polymer formulations, and primer types produce different adhesion and durability profiles. Professional-grade acrylic systems used by experienced technicians consistently outperform lower-quality salon products. Some technicians also use hard gel overlays or gel polish as a top coat over acrylics, which adds a layer of flexibility and UV-cured strength that extends the surface’s durability.
The thickness of the acrylic application also matters. Nails that are applied too thin are more prone to breakage; nails applied too thick are more prone to lifting and feel unnaturally heavy. An experienced technician calibrates the thickness to suit the nail’s length, shape, and the client’s lifestyle.
6. Your Skin and Nail Chemistry
Some people’s natural nail chemistry creates a more challenging environment for acrylic adhesion than others. Naturally oily nail beds produce surface oil more quickly after prep, which can weaken the bond over time. Very moist skin around the nail area, certain medications (particularly those affecting nail health or hydration), and underlying nail conditions can all affect how well acrylic product adheres and holds.
If you’ve genuinely tried multiple high-quality technicians and still consistently experience early lifting, your natural nail chemistry may be a factor — and a technician experienced with adhesion challenges can use stronger primers or different bonding techniques to compensate.
How to Make Your Acrylic Nails Last Longer
The habits below are the most impactful changes you can make between appointments to extend your set’s lifespan. Applied consistently, they can extend a two-week set to three weeks and a three-week set to four weeks.
Wear Gloves for Water and Chemical Exposure
This is the single most effective protective habit available. Prolonged water exposure — dishes, cleaning, bathing with hands submerged — softens the acrylic product and weakens the bond at the cuticle edge over time. Cleaning products and harsh chemicals accelerate this process significantly. Rubber or nitrile gloves for dishwashing and cleaning create a complete barrier against both chemical and moisture damage.
The practical habit: keep gloves by the sink and treat putting them on as automatic rather than optional whenever water or cleaning products are involved.
Apply Cuticle Oil Daily
Cuticle oil is the most consistently underutilized acrylic nail maintenance product. Applied daily to the cuticle area and around the edge of each nail, cuticle oil keeps the skin around the nail hydrated and supple, which prevents the micro-cracking and lifting at the cuticle line that frequently starts when the surrounding skin becomes dry.
The oil also keeps the acrylic itself conditioned — the product can dry out over time, particularly at the edges, and daily oil application helps maintain its flexibility and prevents the brittleness that leads to edge chipping.
How to apply: One drop of cuticle oil (or jojoba oil, which works well as an alternative) pressed into the cuticle area of each nail and gently massaged in. Morning and evening applications are ideal; once daily produces meaningful results.
Avoid Using Your Nails as Tools
Using nails to open cans, pry off lids, scrape surfaces, or any other leverage-based activity places stress on the junction between the acrylic and the natural nail at the point of maximum mechanical disadvantage. This is the most common cause of sudden, single-nail failure — where one nail snaps or lifts dramatically while the others remain intact. Training yourself to use the pads of your fingers, a tool, or a key for these tasks protects the structural integrity of each nail.
Keep Nails Dry After Washing
After washing your hands, thoroughly dry your nails — not just your palms and the backs of your hands, but the spaces between fingers and around the nail edges where moisture can linger. Moisture that sits under or around the acrylic edge is one of the primary contributors to lifting over time. Pat thoroughly with a towel rather than air-drying, which leaves residual moisture at the nail edges longer.
Use Non-Acetone Nail Polish Remover for Touch-Ups
Acetone — the most common nail polish remover ingredient — dissolves acrylic product. Even brief or occasional exposure to acetone around the edges of acrylic nails weakens the structure and can cause lifting or surface damage. When removing gel polish or regular polish over your acrylics, use a specifically acetone-free remover. Your nail technician will use appropriate products at the salon, but for home touch-ups, acetone-free is non-negotiable.
Moisturize Your Hands Consistently
The skin around your nails and the natural nail plate itself both benefit from consistent moisturization. Dry, cracked skin around the nail edge creates pathways for moisture infiltration under the acrylic. A good hand cream applied after handwashing and before bed keeps the surrounding skin healthy and reduces the skin-related lifting that begins at the cuticle line.
Book Fills on Schedule
Waiting significantly beyond the recommended fill window doesn’t extend the value of your appointment — it actually accelerates damage. Once the grow-out gap at the base reaches a certain size, the mechanical stress on the existing acrylic increases as the unsupported length acts as a longer lever. This stress is distributed to the attachment point between the old acrylic and the natural nail, causing the lifting to worsen more quickly. Staying on a consistent two-to-three-week fill schedule prevents this compounding effect.
Avoid Picking or Peeling at the Edges
Any lifting or raised edge on an acrylic nail is tempting to peel back — and doing so almost always makes the situation worse. Peeling the acrylic pulls layers of the natural nail with it, weakening the nail plate and creating a rougher surface for future adhesion. If you notice lifting at an edge, apply a small amount of nail glue to the lifted area as a temporary fix and schedule a fill appointment as soon as possible.
Signs It’s Time for a Fill (Or Removal)
These specific indicators tell you when your nails need professional attention, even if it’s before your scheduled appointment:
Visible grow-out gap at the cuticle line. The most obvious and most common indicator. When a distinct gap is visible between the cuticle and the acrylic product, it’s time for a fill. The gap collects moisture and creates a pathway for bacteria.
Lifting at the edges or sides. If you can feel or see any part of the acrylic lifting away from the natural nail — at the cuticle, at the sides, or at the free edge — schedule a fill. Lifted acrylic creates moisture traps that can cause bacterial or fungal growth underneath.
Noticeable imbalance in nail length or weight. As nails grow, the balance point of the acrylic shifts further from the attachment point. If your nails feel heavier or more unbalanced than usual, a reshaping and rebalancing fill is needed.
Surface cracks or chips. Small surface cracks or chips in the acrylic can be filled and repaired at a standard fill appointment, but they should be addressed before they develop into structural fractures that compromise the whole nail.
A specific nail completely breaking. Individual nail breaks should be repaired at a nail appointment rather than left to grow out. Attempting home repairs with nail glue can temporarily hold but rarely restores the structural integrity that protects the natural nail underneath.
Discoloration, particularly green or yellow under the acrylic. Green discoloration under an acrylic nail is the most serious indicator on this list — it indicates bacterial growth (specifically Pseudomonas aeruginosa) in the space between the acrylic and the natural nail. This requires immediate removal of the acrylic, treatment of the natural nail, and a break from acrylic application until the nail is healthy. Never cover green discoloration with more product.
When Acrylics Don’t Last as Long as They Should
If your acrylics are lifting, breaking, or failing significantly before the two-week mark, something specific is causing the premature failure. The most common culprits are:
Inadequate nail preparation before application. If the nail plate wasn’t properly dehydrated and primed before the acrylic was applied, the bond was never as strong as it should have been. You’ll notice this as early, consistent lifting around the cuticle area rather than at the free edge.
Product applied over oils or moisture. This produces a similar result to inadequate prep — a weak initial bond that fails progressively. This can happen even in high-quality salons if hand lotion was applied before the appointment (which is why nail technicians ask you not to lotion your hands before a service).
Incorrect monomer-to-polymer ratio. Acrylic is mixed from a liquid monomer and a powder polymer. The ratio of these two components affects the final product’s strength, flexibility, and adhesion. If the mix is too wet (too much liquid) the acrylic may be too soft and flexible, making it prone to peeling. If too dry, it may be brittle and prone to cracking.
Application in an environment that’s too cold or too humid. Acrylic product is sensitive to environmental conditions during application and curing. Very cold salon temperatures can slow curing and produce a weaker result. High humidity can introduce moisture into the application process. Professional salons manage their environments, but occasional environmental issues can affect results.
Natural nail damage or health issues. Damaged, ridged, or thin natural nails provide a less stable foundation for acrylic adhesion than healthy, intact nails. If you’ve had nails removed recently, used nail hardeners that left the surface compromised, or have underlying nail health issues, adhesion may be less reliable until the natural nail recovers.
Incompatible products. Using regular nail polish remover (acetone-based) over your acrylics, certain hand sanitizers with acetone content, or aggressive chemical products near the nails can cause premature breakdown.
If early failure is a consistent pattern, the practical approach is to:
Try a different nail technician — either within the same salon or at a different one. Technician skill is the most variable and most impactful single factor.
Tell your technician explicitly that you’ve experienced premature lifting. This gives them the opportunity to use stronger primer, adjust their prep technique, or use a different product formulation.
Evaluate your aftercare habits honestly. Even a perfect application can fail early if the nails are regularly soaked in hot water, exposed to harsh chemicals, or subjected to heavy mechanical stress without protection.
How to Safely Remove Acrylic Nails
When it’s time for a complete removal rather than a fill, professional removal is significantly safer than DIY removal. The safest removal method involves soaking the nails in acetone (either in a bowl or with acetone-soaked cotton wrapped in foil) until the acrylic softens enough to be gently pushed off without force. This process typically takes 20 to 45 minutes depending on the thickness of the acrylic.
The damage from acrylic removal comes almost entirely from forcing the acrylic off before it’s fully softened — this peels layers of the natural nail plate with the acrylic, leaving nails thin, brittle, and temporarily weakened. Patience in the removal process is the single most important factor in protecting natural nail health.
At-home removal, if necessary: Clip or file the top surface of the acrylic to break the seal, soak in 100% acetone for 20 to 30 minutes, then gently push the softened acrylic away with an orange stick — never a metal tool, which can abrade the natural nail. If the acrylic doesn’t release easily, soak for another 10 minutes rather than forcing it. Apply cuticle oil immediately after removal to rehydrate the nail plate.
After removal, give your natural nails a recovery period — at minimum one to two weeks — before a new acrylic application. Use a strengthening nail treatment or simply keep nails well-moisturized during this recovery period.
Final Thoughts
Acrylic nails should genuinely last two to three weeks with standard care — and with the specific habits in this guide applied consistently, that timeline extends meaningfully toward the upper end of the range or beyond. The secret is in two things: the quality of the initial application, which you control through choosing your technician carefully, and the quality of your aftercare, which is entirely within your own daily habits.
Gloves for water exposure, daily cuticle oil, timely fill appointments, and avoiding mechanical stress on the nails don’t require significant time or money — they require consistency. And that consistency is what separates a set that looks flawless for three weeks from one that’s lifting and chipping after ten days.
Invest in a technician you trust. Follow the aftercare habits. And book your fill before the gap gets too large. Your nails will reward the effort.
How long do acrylic nails last without a fill?
With proper aftercare, two to three weeks is the standard range before a fill is needed. Some women with slower nail growth or excellent aftercare habits can stretch to four weeks. Beyond four weeks without a fill, the grow-out gap becomes significant enough to increase the risk of moisture-related issues and structural stress on the acrylic.
Can acrylic nails last a month?
Yes, some well-applied sets with excellent aftercare and slower natural nail growth can last four weeks before a fill. However, this depends significantly on individual growth rate and lifestyle. Most people find three weeks is a more realistic maximum before the grow-out is both aesthetically noticeable and structurally worth addressing.
How long do acrylic nails last on natural nails specifically?
The acrylic application itself doesn’t degrade significantly over three to four weeks — it’s the growth of the natural nail underneath that creates the need for maintenance. The acrylic product can remain structurally sound for longer than the grow-out timeline, which is why fills can be done indefinitely on the same base without complete removal.
Do acrylic nails damage natural nails?
The acrylic product itself is not inherently damaging. The damage that’s often attributed to acrylic nails comes from two sources: the buffing of the natural nail surface during application (which removes some thickness), and — much more significantly — improper removal that forces the acrylic off before it’s fully softened, peeling layers of the natural nail plate in the process. Proper application, proper maintenance, and professional removal significantly reduce or eliminate this damage.
What happens if you leave acrylic nails on too long without a fill?
Leaving acrylics significantly beyond the recommended fill window increases the risk of several problems: the grow-out gap trapping moisture and potentially developing bacterial or fungal growth; increased mechanical stress on the bond between the acrylic and natural nail as the unsupported length grows; and a higher likelihood of individual nail breaks or the acrylic cracking under the increased leverage of longer unsupported lengths. The cost and time of a timely fill is significantly less than treating the consequences of extended neglect.
How often should you take a break from acrylic nails?
Most nail health professionals recommend a complete removal with a recovery period every three to four months of continuous acrylic wear. This allows the natural nail to be fully assessed, any thinning or damage to be addressed, and the nail plate to recover some of its natural strength before the next application cycle begins.