How to Achieve the Perfect At-Home Gel Manicure (Complete Step-by-Step Guide)
A gel manicure is one of those beauty investments that rewards you every single day. The glossy, chip-resistant finish that lasts two weeks without daily maintenance, the way it photographs, the way it makes every outfit look more intentional — it’s genuinely one of the highest-return beauty habits available. And once you understand the technique, doing it at home produces results that are indistinguishable from a salon finish at a fraction of the cost.
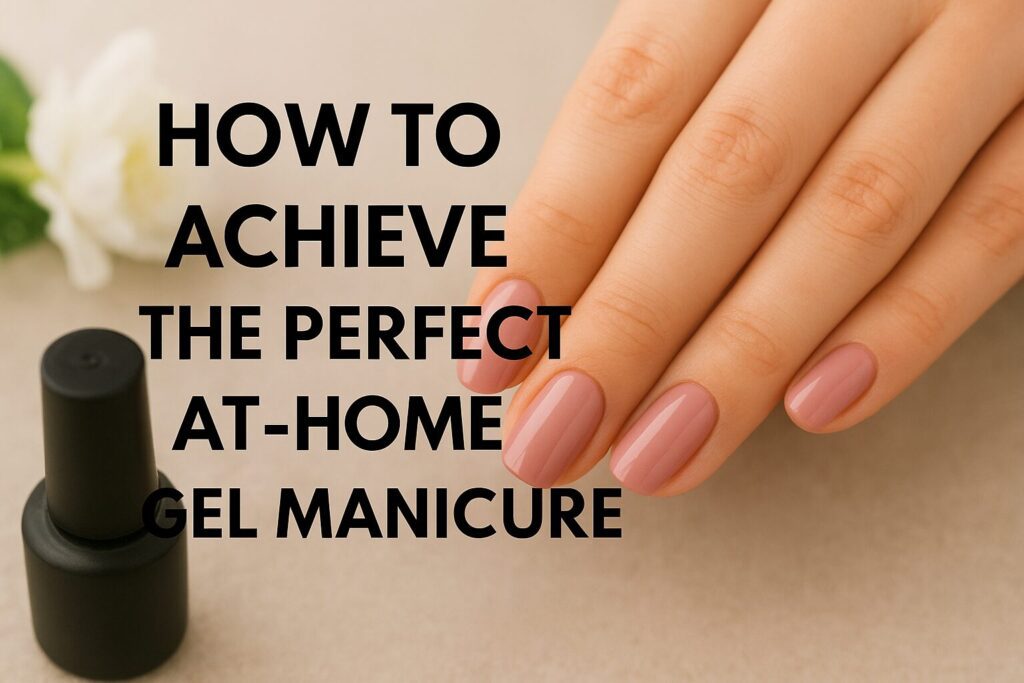
The at-home gel manicure has a reputation for being technically demanding, but the difficulty is almost entirely in the prep and the curing — not in any innate skill. Get those two elements right and everything else follows naturally. Get them wrong and no amount of careful color application will save your manicure from early lifting, bubbling, or an uneven finish.
This guide covers every step of the at-home gel manicure process in complete detail, including the supplies worth investing in, the preparation steps that determine longevity, the application technique that produces a smooth, professional finish, and the aftercare habits that keep your manicure looking perfect for the full two weeks.
What You’ll Need Before You Start
Having every supply within reach before you begin prevents the rushed, improvised moments that produce uneven results. Gel manicure supplies fall into two categories: the essentials you absolutely cannot substitute, and the quality-of-life items that make the process more efficient and professional.
Absolute essentials:
LED or UV nail lamp. The lamp is the single most important investment in your at-home gel kit. Gel polish does not air-dry — it requires UV or LED light to trigger the polymerization process that converts it from a flexible gel into a hard, durable finish. LED lamps cure most gel polishes in 30 to 60 seconds per layer and are the current professional standard. UV lamps take 2 minutes per layer but are also effective. A quality LED lamp costs between $20 and $60 — don’t substitute with a regular light source, which will never cure gel properly.
Gel base coat. A gel-specific base coat, not a regular nail base coat. Gel base coat bonds to the natural nail plate and creates the foundation for the color layers to adhere to. It also protects the natural nail from staining.
Gel polish color(s). Gel polish is specifically formulated for UV/LED curing and is chemically different from regular nail polish. Regular nail polish will not cure under a lamp — it needs to air dry and will not achieve the hard, glossy finish that gel produces. Start with two to three reliable colors from a brand with good reviews.
Gel top coat. A gel-specific top coat seals in the color, adds the signature high-gloss finish, and provides the hardened outer shell that makes gel manicures chip-resistant. Some top coats are “no-wipe” (they cure to a non-tacky finish); others produce a tacky inhibition layer that must be wiped away with a gel cleanser and lint-free wipe after curing.
Nail file and nail buffer. A 180-grit file for shaping nail length and a 220-grit buffer for lightly abrading the nail surface during prep.
Cuticle pusher. A metal or wood manicure stick for pushing back cuticles before application.
Nail dehydrator or rubbing alcohol (90% or higher isopropyl alcohol). Used to remove oils and moisture from the nail plate immediately before base coat application.
Lint-free wipes. Regular cotton pads leave fibers on the nail surface that embed in the gel. Lint-free wipes are essential for both the prep cleaning step and for removing the inhibition layer from any gel top coat that requires it.
Gel cleanser. A cleanser specifically formulated for gel nail use, used to clean the nail surface during prep and to wipe the inhibition layer after the top coat. Rubbing alcohol at 90% or higher concentration can substitute in a pinch.
Cuticle oil. Applied as the final finishing step to nourish the nail bed and skin around the nails after the manicure is complete.
Quality-of-life items worth adding:
- Nail clips or nail forms to hold fingers stable under the lamp
- A small brush dipped in acetone for cleaning up gel that touches the skin or cuticle before curing
- A cuticle remover product (not just a pusher) for cleaner cuticle preparation
- Nail primer for anyone who regularly experiences early lifting (primer significantly improves adhesion on oily or smooth nail plates)
- A nail dehydrator specifically formulated for gel prep (more effective than alcohol alone for people with naturally oily nail beds)
Step 1: Nail Preparation — The Step That Determines Everything
Nail preparation is where most at-home gel manicures succeed or fail. A perfectly applied gel on poorly prepared nails will lift, bubble, or peel within days. A technically simple gel application on perfectly prepared nails will last the full two weeks without issue.
The preparation sequence has five distinct stages, each serving a specific purpose:
Remove any existing polish or gel completely. Any residue from previous applications will prevent the new gel from bonding correctly to the natural nail. Use acetone for gel removal (see the proper removal method at the end of this guide) and acetone or acetone-free remover for regular polish. Wipe away all residue thoroughly.
Trim and shape your nails. File your nails to the desired length and shape before buffing. Filing after buffing can deposit filing dust into the buffed surface in ways that create adhesion problems. Shape with a 180-grit file using consistent, smooth strokes in one direction rather than back-and-forth sawing, which can create micro-fractures at the nail tip.
Push back and address the cuticles. Soak your fingertips in warm water for two to three minutes to soften the cuticles, then dry completely. Use a cuticle pusher to gently push back the cuticle and remove any thin skin (pterygium) that sits on the nail plate surface — this is not the same as the cuticle itself, which should not be cut. Any cuticle skin or tissue remaining on the nail plate surface will prevent gel from adhering to that area and create a lifting point.
Buff the nail surface. Using a 220-grit buffer, lightly buff the entire surface of each nail. You’re not trying to remove significant thickness — you’re creating microscopic texture that gives the gel base coat something to grip. The nail should appear matte after buffing rather than shiny. Avoid buffing so aggressively that you thin the nail plate.
Dehydrate and cleanse the nail surface. This is the step most commonly skipped in at-home manicures and the most consequential omission. Your natural nail plate produces oils that prevent gel from bonding. Even after buffing, skin contact with the nail surface (or using cotton — which can leave fibers and oils — for cleansing) can reintroduce oils that undermine adhesion.
Using a lint-free wipe saturated with rubbing alcohol at 90% or higher (not regular hand sanitizer, which contains moisturizers), wipe each nail thoroughly. A dedicated nail dehydrator applied after the alcohol step provides an additional layer of oil and moisture removal that significantly improves bonding, particularly for people with naturally oily nail plates.
After this step, do not touch the nail surface with your fingers. Touch only the sides of your nails if you need to reposition them.
Apply nail primer if needed. Nail primer is an optional but valuable step for anyone who regularly experiences early lifting. Primer creates a chemical bridge between the natural nail surface and the gel base coat that improves adhesion beyond what dehydration alone achieves. Apply a thin layer, allow it to dry to a tacky state (30 to 60 seconds), and proceed immediately to base coat. Do not cure primer under the lamp — it is an air-dry product.
Step 2: Apply the Gel Base Coat
The base coat is your first cured layer and the foundation of the entire manicure. Its adhesion to the natural nail determines how well everything above it holds.
Apply a thin, even layer to one nail at a time. The base coat should be thin enough that you can almost see through it — this ensures complete curing throughout the layer. A thick base coat may cure on the surface while remaining partially uncured underneath, which weakens the bond.
Two critical application rules that apply to every gel layer:
Do not touch the cuticle or the skin. Leave a very small gap (approximately 1 millimeter) between the gel and the cuticle edge. Gel that touches the cuticle or surrounding skin will lift from that edge, and lifting spreads — the raised edge allows moisture to get under the gel, which causes the separation to grow progressively until the nail needs to be removed and redone. If gel touches the skin, remove it immediately with a brush dipped in acetone before curing.
Cap the free edge. Run the brush along the very tip of the nail to seal the free edge with gel. This edge-sealing step is one of the most impactful longevity techniques available — it prevents the gel from peeling from the tip inward, which is the second most common failure point after cuticle lifting.
Cure each nail under your lamp according to your specific base coat’s instructions — typically 30 to 60 seconds under an LED lamp or 120 seconds under a UV lamp. Cure all nails on one hand before moving to the color step.
The base coat will feel slightly tacky after curing — this is normal and expected. The tacky surface is the inhibition layer, and the color coat bonds to this tacky surface. Do not wipe it.
Step 3: Apply the Gel Color
Gel color application is where the most visible results are produced, but the technique is essentially the same as the base coat: thin layers, free edge capping, and consistent curing.
First color coat: Apply a thin, even layer of gel polish to each nail, working from the base to the tip in smooth, consistent strokes. The first layer often appears sheer or uneven — this is completely normal. Thin layers are always better than thick ones. A thick layer of gel polish will cure on the surface while remaining soft and uncured underneath, leading to wrinkling, bubbling, or a spongy texture that never fully hardens. Cap the free edge on each nail. Cure under the lamp.
Second color coat: Apply a second thin layer for full opacity and depth of color. Most gel polishes require two coats for full coverage; some deep colors may achieve opacity in one; some lighter or sheer shades may need three. Cap the free edge again. Cure under the lamp.
Between each layer, check for any gel that has migrated to the cuticle or surrounding skin. Remove it with an acetone-brush before curing — once gel is cured, it cannot be removed without a full soak-off.
The thin-layers principle in practice: If you’re having trouble getting enough coverage from thin layers, add a third thin layer rather than applying thicker layers. Three thin layers that cure completely will always outperform two thick layers that don’t cure thoroughly.
Step 4: Apply the Gel Top Coat
The top coat is the final gel layer and the one most responsible for the signature gel finish — the deep, glass-like gloss that makes gel manicures so immediately recognizable. It also provides the hard outer shell that protects the color layers from chipping, scratching, and daily mechanical wear.
Apply a thin, even layer over the entire nail surface, ensuring complete coverage with no missed spots. Cap the free edge one final time — the sealed tip is the most important edge to protect with the top coat. Cure under the lamp.
After curing, check whether your specific top coat requires wiping. Most gel top coats produce an inhibition layer — a slightly tacky surface residue — after curing. This layer is normal and does not indicate a curing problem. Wipe it away with a lint-free wipe saturated with gel cleanser or high-percentage isopropyl alcohol, using a firm, even pressure. After wiping, the nail should reveal a deeply glossy, non-tacky finish.
Some top coats are marketed as “no-wipe” — they cure to a glossy, non-tacky finish without a wipe step. Both types produce excellent results; the distinction is simply in the finishing process.
Step 5: Finishing Touches
Once all nails are fully cured and the top coat inhibition layer is wiped away, the gel manicure is technically complete. Two finishing steps elevate the result:
Apply cuticle oil. A drop of cuticle oil massaged into the cuticle area and around the edges of each nail immediately restores the moisture that the dehydration prep removed. It also visually perfects the area around the nail — hydrated, smooth cuticles make the manicure look more professional and polished. Cuticle oil is the one finishing product that can be applied directly to the cured gel without any negative effect on longevity.
Clean up any skin staining. If any gel color stained the skin around the nails during application and wasn’t caught before curing, a cotton bud lightly dipped in acetone can clean the skin without affecting the cured gel on the nail (as long as you’re careful not to saturate the nail edge).
Avoid hand cream immediately after. Heavy moisturizers and hand creams can compromise the freshly completed gel surface in the first hour. Wait at least an hour after completing the manicure before applying any product to the nail area.
Tips for a Long-Lasting At-Home Gel Manicure
The difference between a gel manicure that lasts seven days and one that lasts fourteen often comes down to aftercare habits rather than application quality. These are the most impactful habits for extending your gel manicure’s lifespan:
Wear gloves for all water and chemical exposure. Hot water, dish soap, cleaning products, and chlorine from swimming pools all weaken the gel bond over time. A single long soak or repeated daily dishwashing without gloves can reduce your manicure’s lifespan by days. Keeping rubber or nitrile gloves at the sink and treating them as automatic for dishwashing and cleaning is the single most effective longevity habit available.
Apply cuticle oil daily throughout the manicure’s life, not just at completion. Daily cuticle oil applied to the nail and surrounding skin keeps the adhesion point at the cuticle line flexible and conditioned. Dry, cracking skin around the nail edge creates pathways for moisture infiltration under the gel, which is one of the primary causes of lifting. Morning and evening applications are ideal; once daily produces meaningful results.
Cap the free edge with your fingernail, not the nail tips. One of the most common mechanical failures in gel manicures is peeling from the nail tip, caused by repetitive light impacts against the free edge during typing, picking up objects, and daily tasks. The sealed free edge is your first line of defense, and protecting it by using the pads of your fingers for gripping and pressing rather than the nail tips extends its integrity significantly.
Never use nail tips as tools. Opening cans, prying off lids, scraping stickers — these activities apply lateral stress to the junction between the gel and the natural nail at the most vulnerable angle. Repeatedly using nails as tools is the fastest way to cause sudden, single-nail failure that would otherwise not occur for another week.
Reapply top coat every four to five days. A fresh thin layer of gel top coat applied mid-manicure and cured under your lamp adds another protective layer that refreshes the gloss and reseals any micro-cracks that have developed. This single step can extend a standard two-week manicure to three weeks for many people. Apply it exactly as you would in the original manicure: thin layer, free edge cap, cure under lamp.
Keep your nails away from excessive heat. Hot water is the obvious culprit, but prolonged heat exposure from other sources — extended hot baths, hot tubs, saunas — also softens the gel temporarily and weakens the bond. Minimizing these exposures or protecting your nails during them preserves the structural integrity of the gel.
Avoid acetone-based products near your nails. Acetone dissolves gel polish. Acetone-based nail polish removers, some hand sanitizers, and certain cleaning products with acetone content can damage the gel surface and edges even with brief exposure. Use acetone-free alternatives for any skin-level products that might contact the nail area.
Don’t pick or peel at lifting edges. If a corner or edge begins to lift, the temptation to peel it back is strong — but peeling gel off a natural nail that isn’t fully ready for removal takes layers of the natural nail plate with it, significantly damaging the nail and creating an uneven surface that makes the next application adhere less well. If lifting occurs, apply a small amount of nail glue to the lifted area as a temporary repair and plan a removal or reapplication as soon as possible.
Keep your nails filed and balanced. As natural nails grow under the gel, the mechanical balance of the nail changes — the unsupported length beyond the nail tip acts as a longer lever and concentrates stress at the attachment point. Light filing of the free edge during the manicure’s lifespan (using gentle strokes to maintain shape without cutting into the gel) maintains the structural balance and reduces breakage risk.
Common At-Home Gel Manicure Problems and Solutions
Gel peeling from the tip in the first few days. Cause: free edge was not capped during application, or the dehydration step was insufficient. Solution: always cap the free edge at every layer, use rubbing alcohol followed by a dedicated dehydrator, and ensure the base coat is applied with a complete seal at the tip.
Bubbles in the gel surface. Cause: either the gel was applied too thick, cured too quickly at high heat, or air was introduced by shaking the gel bottle. Solution: apply thinner layers, avoid shaking gel polish (roll between palms instead), and if your lamp runs hot, briefly release after the initial 5 to 10 seconds to prevent heat spikes that trap air.
Gel not curing properly — remaining tacky after curing, or soft and flexible. Cause: insufficient curing time, wrong lamp for the gel brand, or the lamp’s bulbs needing replacement. Solution: check that your lamp wattage is sufficient for the gel brand you’re using (most professional gels specify minimum wattage), add additional curing time, and replace LED bulbs annually or as the manufacturer recommends.
Lifting at the cuticle line within the first week. Cause: gel was applied too close to or touching the cuticle, or there was residual oil on the nail surface during application. Solution: ensure proper dehydration prep, leave a 1mm gap at the cuticle consistently, and use a nail primer for people with naturally oily nail plates.
Gel color changing to yellow or orange. Cause: UV exposure from sunlight or certain lighting can cause lighter gel colors to shift in tone. Solution: apply an extra coat of top coat specifically on the lighter nails and limit prolonged direct sun exposure — or choose a top coat with UV filters if this is a recurring issue.
Wrinkling on the surface of the cured gel. Cause: the gel layer was applied too thick. Solution: remove the wrinkled layer with a light buff or complete removal and restart with significantly thinner layers.
How to Safely Remove At-Home Gel Nails
Proper removal is as important as proper application for long-term nail health. Forcing gel off a nail that isn’t ready — the peel-and-rip method — removes layers of the natural nail plate with the gel, leaving nails thin, damaged, and prone to breakage. The acetone soak method is the only safe approach.
What you’ll need: 100% acetone (not nail polish remover, which is diluted), aluminum foil cut into small squares, cotton balls or pads, a nail buffer, cuticle oil.
The process:
First, lightly buff the top coat surface of each nail — just enough to break the seal and allow the acetone to penetrate. You don’t need to remove the color, just scratch through the top coat’s surface barrier.
Soak a small piece of cotton ball in 100% acetone, place it against the nail, and wrap the finger tightly in a square of aluminum foil. Repeat for all nails. Leave the wraps in place for 15 to 20 minutes — resist the urge to check early, as partially softened gel that is forced off causes the most damage.
After 15 to 20 minutes, unwrap one finger. The gel should have softened into a slightly wrinkled, separating layer. Using an orange stick or cuticle pusher, gently push the softened gel toward the tip — it should slide off cleanly without significant pressure. If it doesn’t move easily, rewrap and soak for another five minutes. Never force it.
Once all gel is removed, lightly buff away any residual softened gel and wash hands thoroughly to remove acetone residue. Apply cuticle oil generously to each nail and massage in thoroughly. The nail may appear slightly matte and feel temporarily thin — this is normal and resolves within a few days with consistent cuticle oil application.
Building Your At-Home Gel Kit Over Time
Starting with the essentials produces good results. Expanding your kit strategically over time produces professional results. The additions most worth making after your first few successful manicures:
A dedicated nail dehydrator. More effective than alcohol alone for oil removal and makes a visible difference in adhesion longevity, particularly for naturally oily nail plates.
A nail primer. The most impactful single product addition for anyone who experiences any early lifting. Apply after dehydrator, before base coat.
A gel lamp with 36 watts or higher. Lower-wattage lamps can cure gel but require longer curing times and may undercure thicker areas. A 36W or 48W LED lamp is the professional standard and produces more reliable curing across all gel brands.
Multiple gel color collections. Starting with two to three colors limits your creative options. Building a small collection across a range of neutrals, one or two seasonal shades, and one or two statement colors gives you enough variety to do different nails every two weeks without any color fatigue.
Nail art tools. Thin striping brushes, dotting tools, and nail stamping kits open up design possibilities that transform a basic gel manicure into genuine nail art, all achievable at home with practice.
Final Thoughts
The at-home gel manicure is genuinely achievable for anyone willing to invest in the right supplies and take the preparation steps seriously. The technique isn’t difficult — it’s methodical. Each step has a specific purpose, and understanding why you’re doing each thing (not just that you’re supposed to) is what makes troubleshooting easy when something doesn’t go perfectly.
Start with complete, thorough prep. Apply thin layers. Cap every free edge. Cure fully at every step. Protect the manicure with gloves and daily cuticle oil. And when it’s time to remove, soak patiently rather than peeling.
Master these fundamentals and your at-home gel manicure will be genuinely indistinguishable from what you’d pay for at a salon — for a fraction of the cost, on your schedule, in exactly the colors you want.
Bookmark this guide and refer back to it for your first few manicures until the steps become second nature.
How long does an at-home gel manicure last?
With proper prep and aftercare, an at-home gel manicure should last two weeks without chipping. With excellent prep (thorough dehydration, primer, careful edge-capping) and consistent aftercare (gloves for water exposure, daily cuticle oil, mid-manicure top coat reapplication), three weeks is achievable. The limiting factor is usually natural nail growth creating a visible gap at the cuticle rather than the gel itself failing.
Can I use regular nail polish instead of gel polish for this process?
No. Regular nail polish will not cure under a UV or LED lamp — it air-dries through solvent evaporation, not UV polymerization. Applying regular polish and curing it under a lamp will produce a surface that appears dry but remains soft underneath and won’t achieve a hard, chip-resistant gel finish. Gel-specific polish, base coat, and top coat are all required for a genuine gel manicure.
Why is my gel not curing properly?
The most common causes are insufficient curing time, a lamp wattage that’s too low for the gel brand being used, or LED bulbs that need replacement. Check your gel brand’s recommended curing time and minimum lamp wattage, add 10 to 15 seconds to your curing time per layer, and consider whether your lamp needs its bulbs replaced (typically annually).
Can I do gel nail art at home?
Yes — gel polish can be used for nail art the same way regular polish can, with the added benefit of curing between steps so each layer is dry before the next is applied. Stamping, striping, dotting tool work, and freehand brush work all translate to gel with the same techniques, just with a curing step between layers.
Is it safe to do gel manicures at home regularly?
Yes, when done correctly. The key is thorough but not aggressive buffing during prep (over-buffing thins the nail plate), complete curing at each step (undercured gel can cause skin sensitization over time with repeated exposure), and proper soak-off removal rather than forced peeling. Regular cuticle oil application and occasional breaks from gel to allow the natural nail to recover are also healthy practices for anyone doing frequent gel manicures.
How often should I take a break from gel nails?
Most nail health professionals recommend a one to two week break from gel polish every three to four months to allow the natural nail to be assessed and to recover any mild thinning from repeated prep buffing. During breaks, a nail strengthening treatment or simple moisturizing routine helps restore the nail plate’s natural resilience.