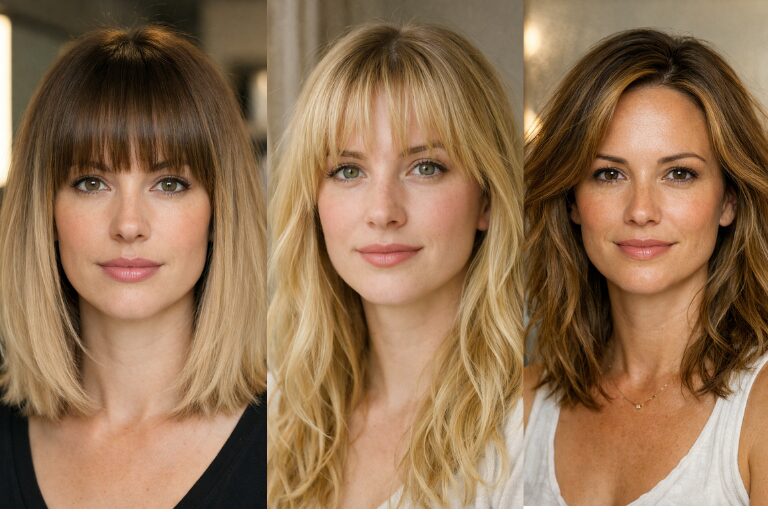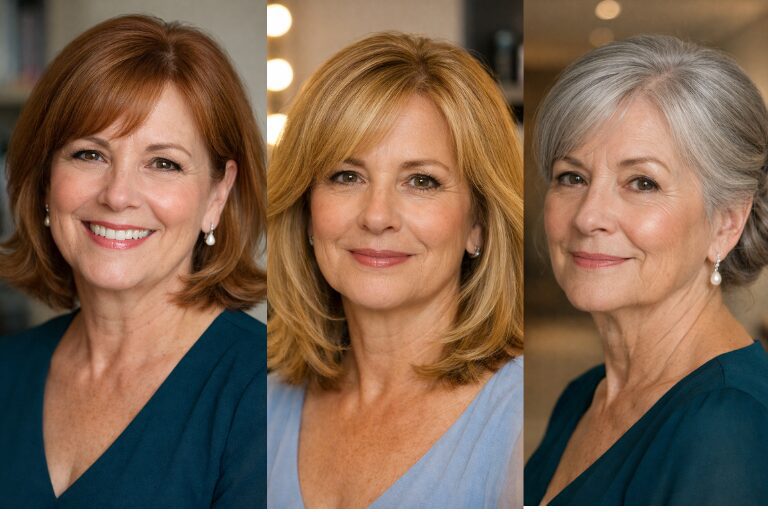
19 Modern Layered Haircuts That Transform Every Hair Type
A truly great layered haircut is one of the most consistently rewarding beauty decisions available. Not because of what it looks like on day one in the salon — though that’s often spectacular — but because of what it does for you on every ordinary day afterward. The way it moves when you walk. The way it catches light at different angles. The way it requires progressively less effort to look good the longer you understand how it works with your specific hair. Great layering doesn’t just change a haircut. It changes a relationship with hair.
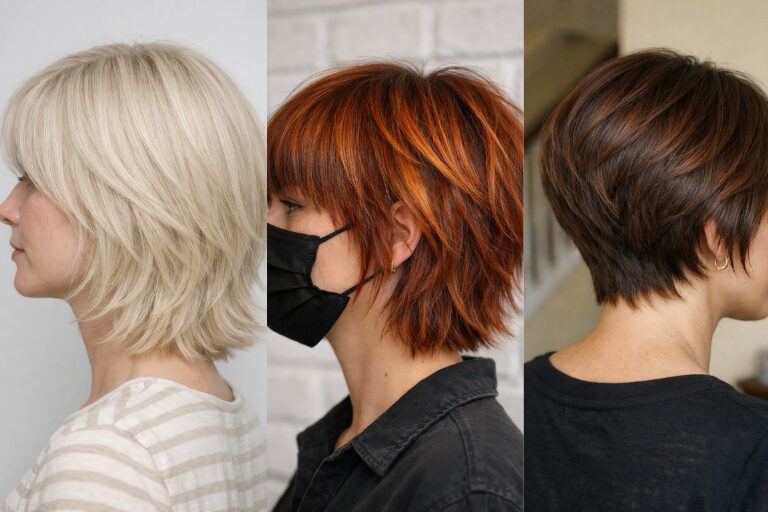
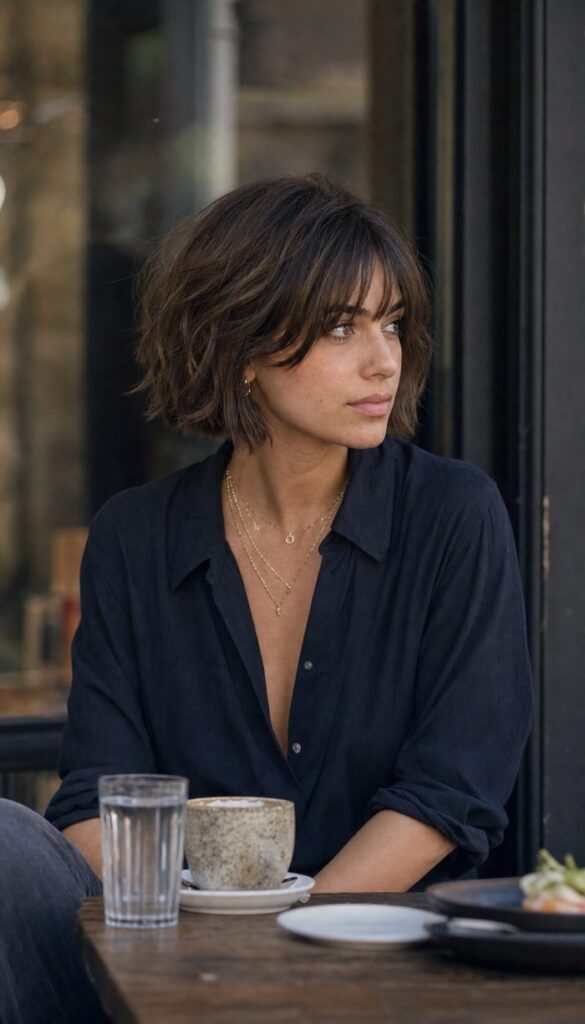
Modern layered haircuts have evolved considerably from the heavily chunky, step-cut styles that dominated earlier decades. Today’s layering is more sophisticated, more tailored to individual hair texture, and more focused on creating natural movement and dimension than on producing an obviously “layered” result. The best contemporary layered cuts look effortless — as though the hair simply behaves this well on its own. The layering is the invisible architecture that makes that effortlessness possible.
These 19 modern layered haircuts cover every hair type, every length, and every style personality — from the most relaxed and maintenance-free to the most dramatically editorial. Each one comes with a detailed explanation of what makes it work, who it works best for, and exactly how to style and maintain it at home.
What Makes Modern Layering Different
Before the styles, it’s worth understanding what distinguishes genuinely modern layering from its predecessors — because this knowledge changes both how you choose a cut and how you talk to your stylist.
Modern layering works with the hair’s natural texture, not against it. Earlier approaches to layering often fought the hair’s natural tendency — trying to create movement in straight hair that wanted to lie flat, or attempting to tame curly hair by cutting it in ways that disrupted the curl pattern. Contemporary layering philosophy starts with the hair’s natural behavior and creates a cut that enhances that behavior rather than overriding it.
Interior layering versus surface layering. One of the most significant advances in modern cutting technique is the distinction between layers that live inside the hair (creating movement and volume from within the silhouette) and layers that are visible at the surface (creating texture and choppy ends). The best contemporary cuts use both strategically — interior layers for lift and movement, surface layers only where texture is specifically desired.
Dry cutting has transformed layered cuts for curly and wavy hair. Cutting curly or wavy hair in its dry, natural state rather than wet allows the stylist to see exactly how each curl pattern behaves and where weight needs to be removed. The results are dramatically better for textured hair types. If you have curly or wavy hair and your stylist has never offered to cut it dry, this conversation is worth initiating.
The perimeter is as important as the layering. A strong, clean hemline — even in a heavily layered cut — provides the visual foundation that makes all the interior movement look intentional. Modern layering maintains a clear perimeter shape and puts the texture and movement inside that frame.
19 Modern Layered Haircuts
1. The Cascading Long Layer
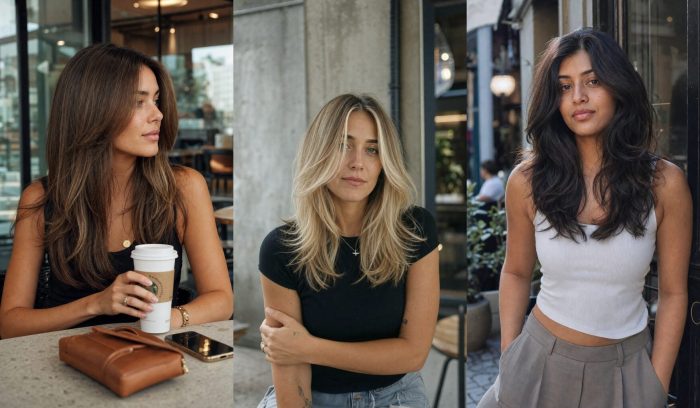
The cascading long layer is the most elegant solution to the most common long-hair problem: the weight of long hair without layers creates a flat, heavy silhouette that lies static against the body and loses shape by mid-day. Seamlessly blended layers beginning around the collarbone and flowing downward create a graduated, waterfall-like movement through the lengths that makes long hair look alive, dimensional, and effortlessly romantic.
What distinguishes the cascading long layer from simpler long haircuts is the specific quality of the layering technique. The layers should be long and graduated rather than short and choppy — the goal is to create a seamless waterfall of hair where the transition between lengths is imperceptible, not a series of obvious steps. This technique preserves the perception of fullness and length while completely transforming how the hair moves.
Best for: Straight and wavy hair textures where the layers reveal themselves with movement. Medium to thick density — very fine hair needs a more conservative approach to preserve perimeter weight.
What to ask your stylist for: “Long, seamlessly blended layers starting around the collarbone, with the longest layers cutting at most two to three inches shorter than my full length.” The key word is “blended” — you want invisible transitions, not visible steps.
Styling tip: A lightweight volumizing mousse applied to damp hair before rough-drying creates the lifting foundation. Follow with a large round brush to smooth and direct the lengths, then a 1.5-inch curling wand on large sections — alternating direction between each section — for natural, undone movement. A few drops of hair oil pressed through the mid-lengths and ends enhances the dimensional separation between layers without adding weight.
Maintenance: Every eight to twelve weeks for trims. The long layers grow out gradually rather than awkwardly, which makes this one of the most forgiving styles between appointments.
2. The Textured Bob with Layers
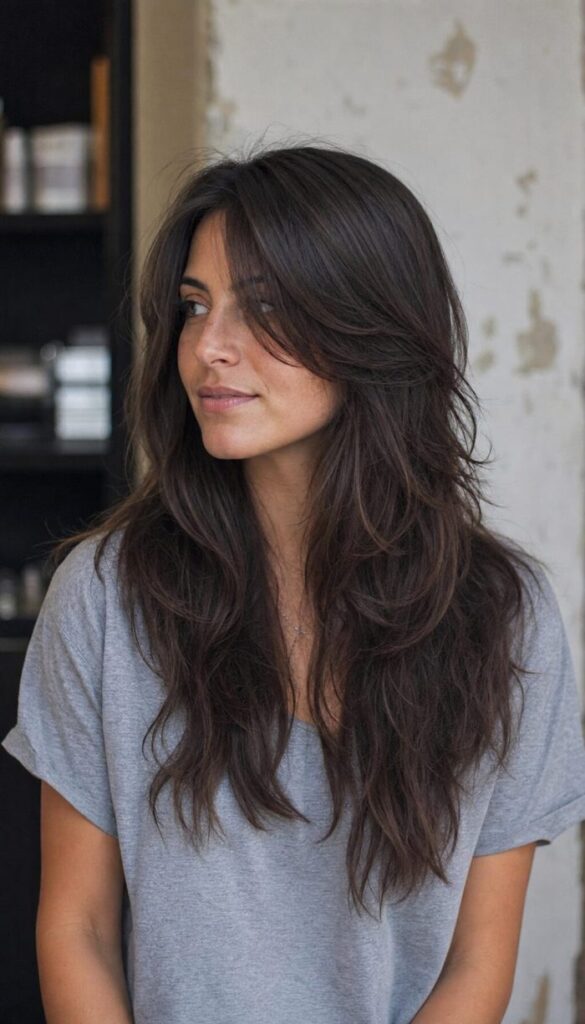
The textured layered bob takes the clean, universally flattering bob silhouette and introduces interior movement that transforms it from static to dynamic. Rather than lying in a uniform line, the layers within this cut create a softly undone, lived-in energy that reads as genuinely effortless — the kind of bob that looks better at 4pm than it did at 8am.
The critical distinction in this cut is where the layers live. In a textured bob, the layering is concentrated at the surface of the hair and through the mid-lengths, creating visible texture and separation at the ends. This is different from the invisible layering approach — here, the texture is part of the aesthetic. The ends should have a slightly imperfect, organic quality that looks intentional rather than grown-out.
Best for: Wavy and slightly coarse hair textures where the natural movement enhances the textured quality. Works well for medium to thick density. Can be adapted for fine hair with conservative layering (avoiding aggressive thinning).
What to ask your stylist for: Point-cut layering through the ends for organic texture, concentrated through the mid-lengths and surface. “I want the ends to look soft and slightly undone, not blunt.” Specify the texture quality — do you want barely-there texture or more obvious choppiness?
Styling tip: A texturizing cream scrunched through damp hair and left to air dry produces the most natural, organic finish. For a sleeker result, direct a medium-heat blow dryer downward with a flat brush to smooth the cuticle while preserving some end texture. A ceramic straightener used to create alternating shallow bends — not curls, just slight directional changes — produces a modern, editorial finish that’s particularly effective on this cut.
Maintenance: Every five to six weeks. The textured ends begin to look grown-out rather than intentional if left too long, as the point-cut edges soften into bluntness.
3. The Curtain Fringe with Face-Framing Layers
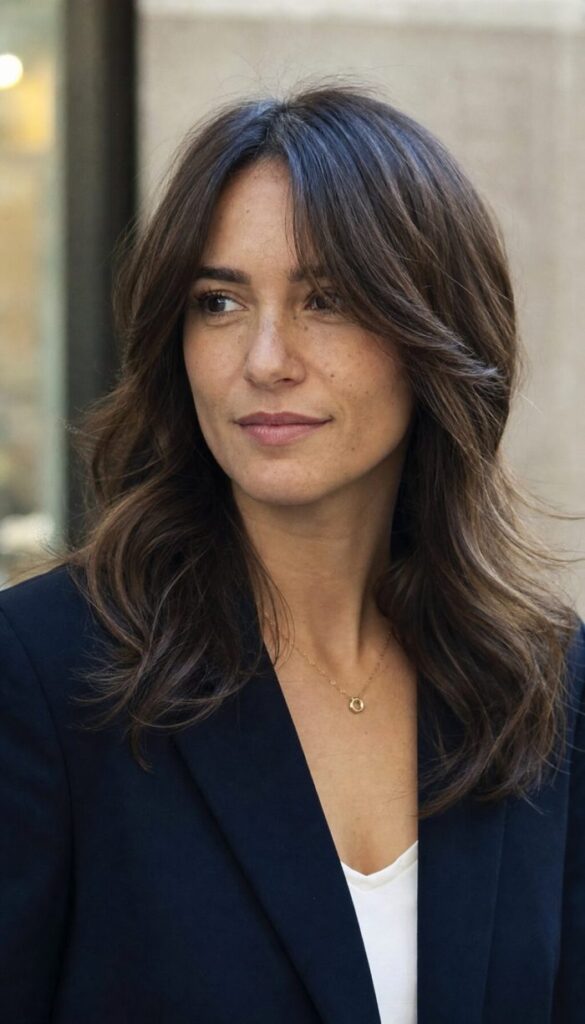
The curtain fringe and face-framing layer combination has earned its iconic status through one of the most reliable styling principles available: framing the face from multiple directions simultaneously. The curtain fringe creates a vertical frame — softening the forehead and drawing attention to the eyes from above. The face-framing layers create a side frame — tracing the cheekbones and jaw with graduated lengths that add visual softness to the face’s perimeter. Together they create a halo effect that’s genuinely cinematic.
What makes this combination particularly powerful is the synergy between the two elements. Curtain bangs alone can look somewhat isolated from the rest of the haircut. Face-framing layers alone can look like standard layering. Together, they create a complete, unified framing system where every element is in conversation with the others.
Best for: Most face shapes, with specific benefits for heart-shaped (the fringe softens the forehead), oval (shows off the shape), and square faces (the diagonal lines of the curtain fringe soften angular jaw). Works across most hair textures.
What to ask your stylist for: “Curtain bangs that part naturally at center and fall to around the cheekbone, paired with face-framing layers that blend seamlessly into the rest of the cut.” The transition between the fringe and the face-framing layers should be imperceptible — they’re the same continuous framing system, not two separate elements.
Styling tip: Style the fringe first — always. Use a small round brush to pull each side of the curtain fringe outward and slightly downward from the center part, blow-drying in that direction until set. Then use a 1-inch curling iron on the face-framing layers, wrapping sections away from the face, to open the features. A light-hold pomade or wax used sparingly can separate and define the fringe on days when it becomes too voluminous or loses its parted quality.
Maintenance: The fringe grows faster than the rest of the cut — expect to trim it every four to six weeks while the rest of the haircut can go six to eight weeks.
4. The Wolf Cut
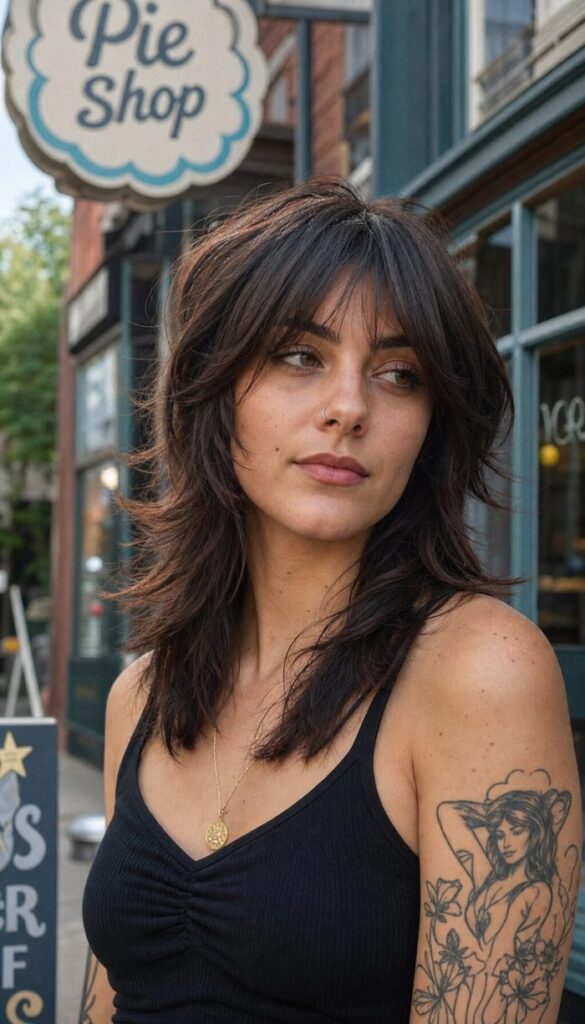
The wolf cut is the most culturally significant layered haircut of the past several years — a style that synthesizes the volume architecture of the 1970s shag, the length graduation of the mullet, and the contemporary textured movement of modern layering into something that feels entirely of this moment. The defining characteristic is the dramatic volume differential: very heavy, short layers at the crown that create significant elevation and drama at the top, transitioning into longer, wilder lengths at the back and sides.
The wolf cut’s edgy reputation is somewhat misleading — it’s actually one of the most flattering structures available for a wide range of hair types and face shapes, because the voluminous crown adds perceived height to the face’s upper register while the longer lengths create elongation below. It’s simultaneously dramatic and structurally intelligent.
Best for: Wavy, curly, and thick hair textures, where the natural volume of the crown layers is enhanced rather than manufactured. Can work on straight hair with dedicated styling effort to create the signature elevated crown. Not ideal for very fine, flat hair where the crown volume can be difficult to maintain.
What to ask your stylist for: “Heavy layers through the crown and top, with a longer, looser graduation through the back and sides. I want the top to feel voluminous and slightly disconnected from the longer lengths.” Bring reference photos — the wolf cut has many variations from subtle to dramatic, and your stylist needs to see the specific version you’re drawn to.
Styling tip: For wavy or curly hair, flip the head upside down and diffuse on medium heat to maximize crown volume before flipping upright. Use a pick or wide-tooth comb to lift the roots further at the crown. For straight hair, a volumizing root spray followed by diffuser-attachment drying (even on straight hair) creates the disheveled, voluminous crown that defines the wolf cut. Texturizing spray on the lengths, scrunched upward, encourages the movement and wildness at the back.
Maintenance: Every six to eight weeks. The wolf cut grows out relatively gracefully because the style is designed to look slightly imprecise — minor growth doesn’t immediately disrupt the look.
5. The Shag Haircut
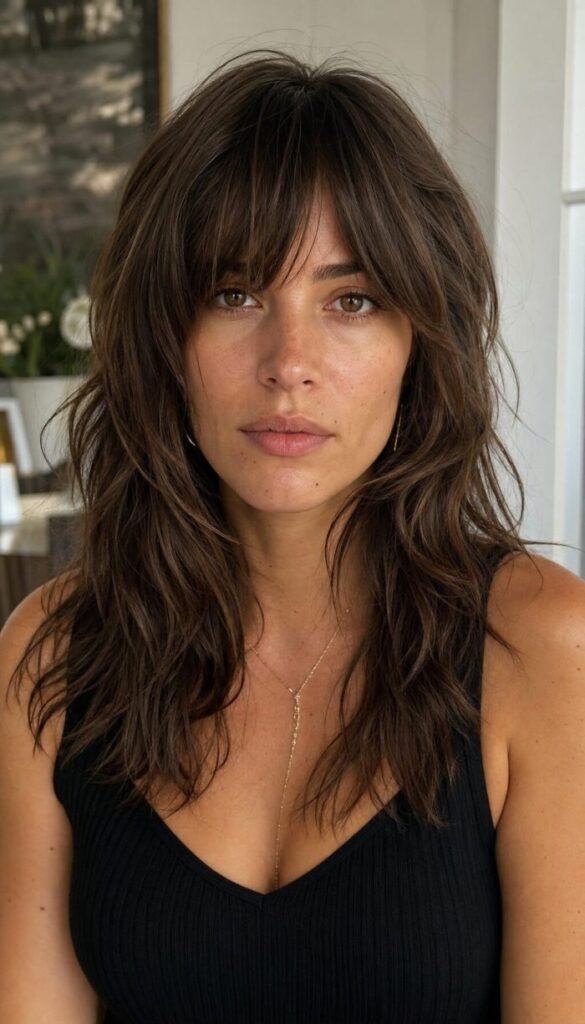
The shag is the original layered haircut — created in the early 1970s and continuously reimagined into one of the most enduring, beloved cuts in hair history. What makes the contemporary shag distinct from its predecessors is the sophistication of its layering: today’s shag uses choppy, feathered layers throughout the entire length — often accompanied by a fringe or curtain bang — but with a precision and intentionality that the original, more spontaneously cut versions lacked. The result is high-volume, high-texture movement that manages to feel simultaneously vintage and unmistakably current.
The shag’s most valuable quality is its scalability — it works from a pixie-adjacent short shag to a long bohemian version that falls past the shoulders. The layering technique removes weight strategically throughout the entire head of hair, which makes it particularly transformative for thick, heavy hair that wants movement and lightness without sacrificing length.
Best for: Medium to thick hair density, wavy to curly textures where the natural movement enhances the shaggy quality. Can work on straight hair with dedicated texture styling. Not the first choice for very fine hair, where heavy layering throughout can make ends look sparse.
What to ask your stylist for: “Choppy, feathered layers throughout with the fringe blended into the face-framing pieces.” The difference between a shag and a wolf cut is the even distribution of layers — a shag layers consistently from crown to ends, while a wolf cut concentrates volume dramatically at the crown. Specify which aesthetic you’re after before the scissors come out.
Styling tip: Texturizing mousse or styling cream scrunched through damp hair, then air-dried or diffused, is the shag’s ideal styling approach. For a more defined finish, a 1-inch curling iron creates imperfect waves that the shag enhances beautifully — break each curl apart with fingers immediately after releasing the iron while still warm. The fringe can be blown dry with a round brush for polish or simply pushed aside and air-dried for the shag’s signature effortless cool.
Maintenance: Every six to eight weeks. Fringe and face-framing pieces may need attention every four to five weeks.
6. The Lob with Invisible Layers
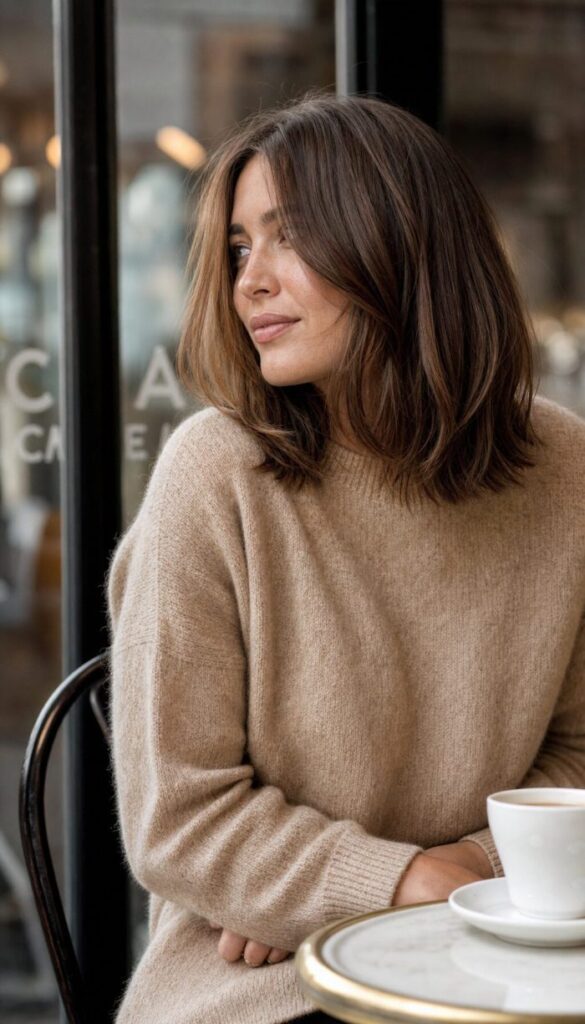
Invisible layers — also called internal layers or interior layers — are one of the most technically sophisticated approaches to layering available, specifically because they create a result that defies visible analysis. The outer silhouette of the lob remains completely clean and polished. The interior of the hair is transformed with movement and lightness. The effect is a lob that appears effortlessly full and dynamic without any of the choppy or obvious layering that can sometimes feel dated — hair that simply behaves better than it looks like it should.
This technique is the ideal solution for a very specific stylistic tension: the desire for the clean, sophisticated look of a blunt lob combined with the practical need for internal movement and volume that a truly blunt cut on denser hair can’t provide.
Best for: Fine to medium hair that wants the appearance of a clean blunt lob without the flatness. Also excellent for women growing out previous layers who want a tidy, transitional style that maintains movement through the grow-out.
What to ask your stylist for: “Invisible internal layers — I want the outer shape to look completely blunt but I need interior movement to prevent the lob from sitting flat.” Many stylists call this “internal graduation” or “disconnected layers.” The perimeter should look untouched.
Styling tip: A large paddle brush blow-dry creates the sleek surface that shows off this technique’s clean exterior. The invisible layers reveal themselves beautifully when a large-barrel curling iron is used on loose sections — the different internal lengths create natural variation in the wave pattern that looks dimensional and expensive. A smoothing serum through damp hair before blow-drying keeps the surface sleek while the interior movement does its work.
Maintenance: Every six to eight weeks. The invisible layering grows out more gracefully than surface layering, which is part of its practical appeal.
7. The Layered Pixie Cut
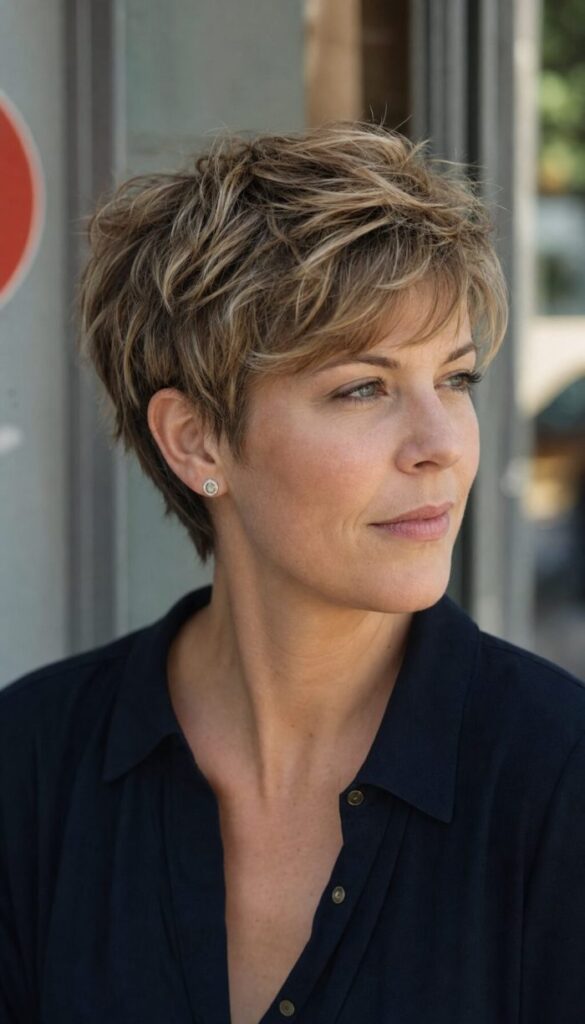
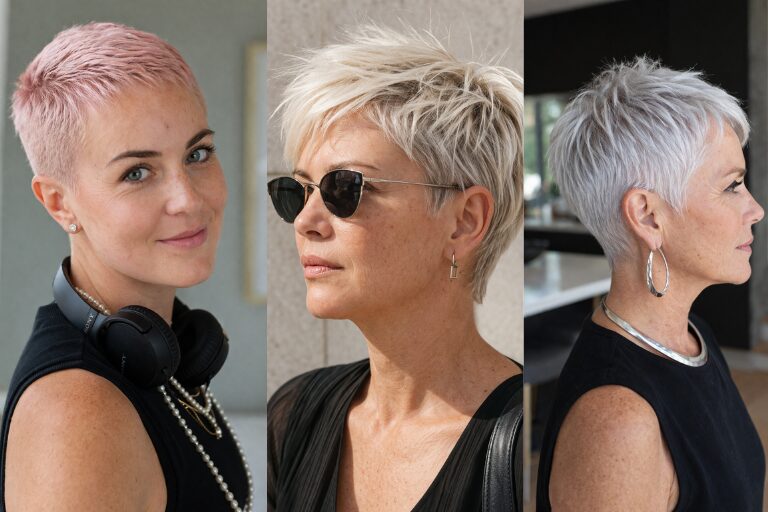
The layered pixie is one of the most architecturally sophisticated short hairstyles available — and when it’s cut correctly, it’s also one of the most universally flattering. Unlike a traditional flat pixie, which can feel uniform and static, the layered version incorporates feathered layers through the crown and top that create movement, texture, and the ability to style in multiple directions. The sides and back remain close-cropped as the structural foundation, while the top’s length and layering provide the expressive, sculptural element.
The layered pixie’s most remarkable quality is what it does for the face. By keeping the hair close at the sides and back while adding volume and movement at the crown, the cut elongates the face, draws attention to the cheekbones, and creates a clean, elegant line from the jaw to the neck that no longer cut can replicate.
Best for: All hair types — the styling approach and the specific layer lengths are adjusted for different textures, but the fundamental structure works across straight, wavy, curly, fine, and thick hair. Particularly transformative for women who have been thinking about going short but are nervous about the commitment.
What to ask your stylist for: “A layered pixie with enough length at the crown to style multiple ways — I want texture and movement on top, close at the sides and back.” Bring reference photos showing both the overall shape and the specific styling direction you prefer (swept forward, tousled upward, smooth and structured).
Styling tip: A small amount of pomade or styling cream on dry hair, pushed through the top layers with fingertips upward and slightly forward, creates the modern textured finish. A fine-tooth comb and light-hold gel produces the sleek, architectural version. A tiny amount of wax pressed through the very tips of the top layers adds the definition and separation that makes the layering most visible.
Maintenance: Every four to six weeks for the sides and back. Every six weeks for the overall shape. The layered pixie is the highest-maintenance cut on this list in terms of salon frequency.
8. The Butterfly Cut
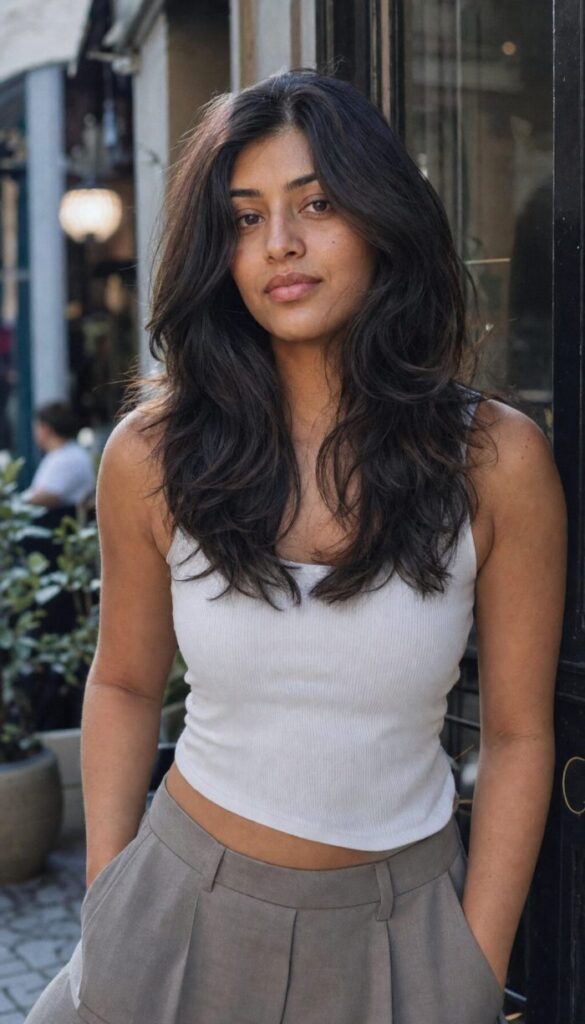
The butterfly cut is the most distinctly romantic entry in contemporary layered styling — a style that takes its name from the winged silhouette created by its signature layering architecture. The cut features two clearly differentiated tiers: shorter, face-framing layers that fan outward from the crown like wings, and longer underneath layers that form the body of the butterfly silhouette. When the hair moves, the two tiers interact to create a sweeping, dimensional quality that genuinely looks like wings in motion.
What makes the butterfly cut genuinely special is how it interacts differently with different hair textures. Wavy and curly hair produces a defined, springy version where each layer has its own distinct personality. Straight hair creates a sleeker, more flowing interpretation where the layering creates movement that mimics waves. Both interpretations are beautiful — they’re just distinct expressions of the same underlying architecture.
Best for: Most hair types and densities. Particularly stunning on wavy and curly hair where the layering enhances the natural texture pattern. Works beautifully on straight hair when styled with loose waves.
What to ask your stylist for: “A butterfly cut with clearly defined shorter layers at the face and crown that create the wing shape, and longer layers underneath. I want the two tiers to be visible and distinct rather than seamlessly blended.” The distinguishing characteristic of a butterfly cut versus a standard layered cut is this visible tiering — it should look structured, not blended.
Styling tip: Curl-enhancing cream applied to damp hair and scrunched upward, then diffused on low heat, sets the butterfly structure beautifully on wavy or curly hair. For straight hair, a large-barrel wand creates loose, sweeping waves that follow the natural direction of the layers — always wrap away from the face to maximize the open, wing-like quality. A light-hold flexible hairspray preserves the movement without eliminating the airy quality that makes this cut most beautiful.
Maintenance: Every eight to ten weeks. The visible tiering of the butterfly cut can begin to blur as it grows, at which point the shorter face-framing layers specifically benefit from a refresh.
9. The Layered Collarbone Cut
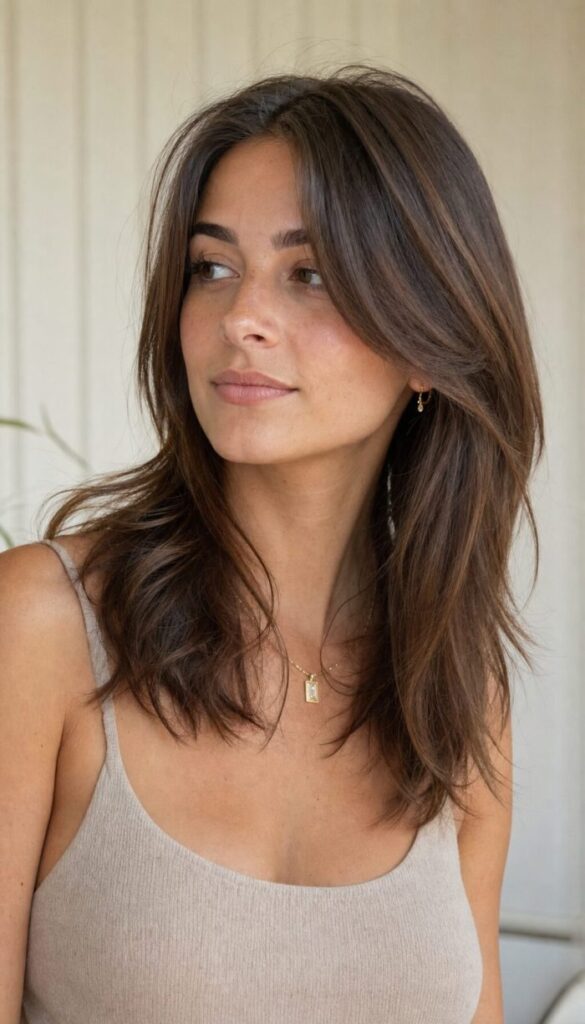
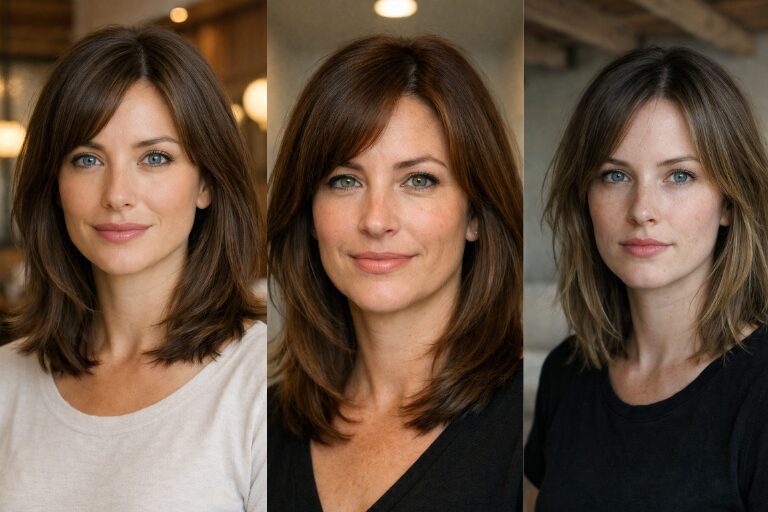
The collarbone-length layered cut sits at what many stylists consider the most universally flattering length available — long enough to feel luxurious, short enough to maintain shape, and positioned at the visual focal point of the décolletage in a way that creates natural elegance when wearing open necklines. At this length, layers have the perfect amount of space to move and develop genuine dimension without the weight concerns of longer styles or the styling intensity of shorter ones.
The medium-length layers in this cut — beginning around the cheekbones and blending gradually into the full length — create a soft, graduated effect that makes the hair look full of natural life. It’s the cut that flatters the widest range of face shapes and hair types simultaneously, which is why it appears consistently on “most flattering” lists across decades and stylists.
Best for: Every face shape and most hair types. Particularly excellent for fine to medium hair that needs movement without losing perimeter density. One of the most genuinely universal cuts on this list.
What to ask your stylist for: “Layers starting at the cheekbone blending gradually into the collarbone length. I want the layers to create movement and fullness rather than obvious texture.” The word “gradual” is important — steep graduation at this length can create an overly layered look; gentle graduation creates the most flattering result.
Styling tip: A medium round brush used during blow-drying with a gentle inward bend at the ends creates the classic, polished finish that makes collarbone layers look most sophisticated. Sea salt spray scrunched into damp hair and left to air dry produces a beachy, effortless texture. The collarbone cut is one of the best lengths for half-up styles — the layers at the face fall naturally when the back is secured, creating effortless face-framing without any additional styling.
Maintenance: Every six to eight weeks. One of the most graceful growers on this list.
10. The Layered Balayage Bob
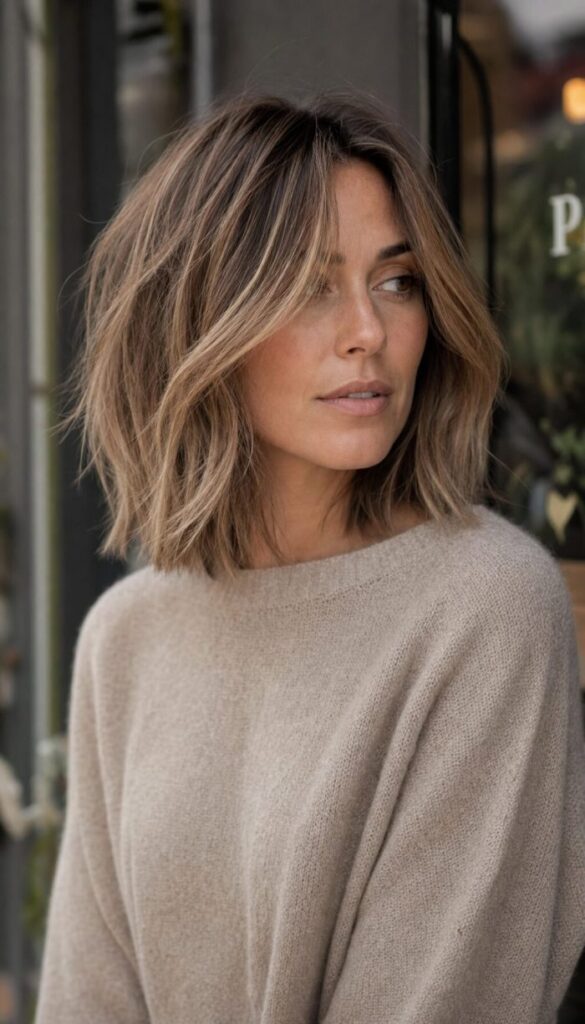
The layered balayage bob demonstrates one of the most powerful principles in hair: that color and cut work together, not independently. When balanced properly, each amplifies the other in ways that neither achieves alone. The dimensional, graduated tones of balayage — lighter at the surface, darker at the interior — create a tonal story that the layering then activates: every layer catches light differently, revealing a new depth of color as the hair moves. The cut makes the color richer; the color makes the cut more dimensional.
This style also cleverly uses color to solve a visual density problem. The lighter surface layers appear to lift the hair visually; the deeper interior tones add shadow and depth that reads as thickness. For fine or medium hair wanting to appear fuller, this combination is one of the most effective optical strategies available.
Best for: Straight to wavy hair textures where the smooth surface allows the tonal balayage variation to be most clearly visible. Works across densities, though fine hair benefits most from the optical density that the color variation creates.
What to ask your colorist for: Balayage that concentrates the lighter tones specifically at the surface layers — this is the placement that maximizes the color-movement interaction. Ask for the highlights to be painted following the direction of the layers rather than placed randomly.
Styling tip: Loose waves created with a 1-inch curling iron — alternating direction on each section — reveal the balayage at every angle simultaneously, which is the most spectacular presentation of this cut. A glossing serum applied before styling amplifies the color’s luminosity. A color-depositing conditioner in a warm golden tone used every two to three weeks keeps the balayage looking fresh between appointments.
Maintenance: The cut every six to seven weeks. The color every ten to fourteen weeks, with a toner or gloss at the six-to-eight week mark if the tone needs refreshing between full appointments.
11. The Layered Curly Cut
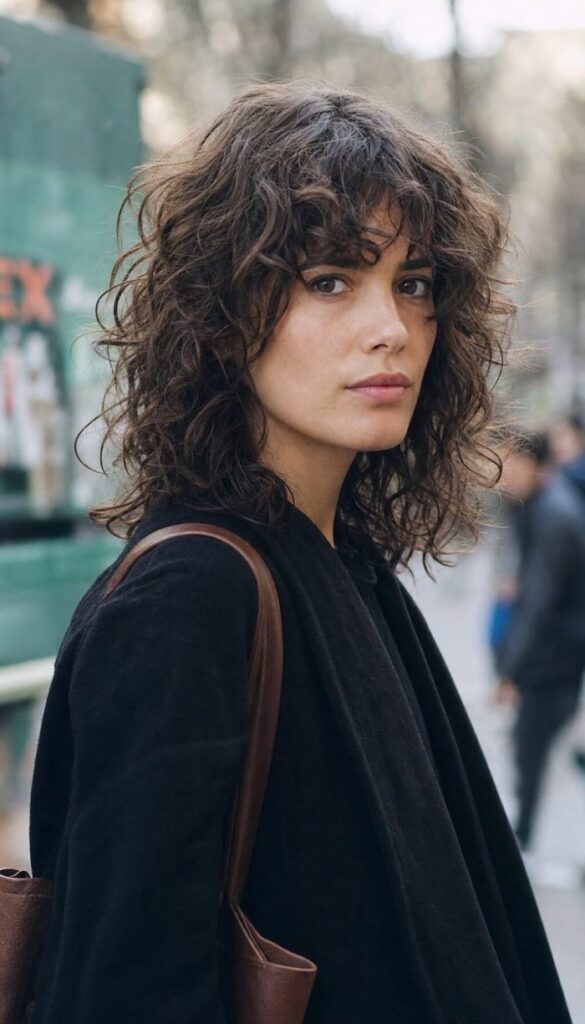
A layered curly cut done correctly is a transformative experience — and done incorrectly is a frustrating one. The difference almost entirely comes down to whether the cut is performed on dry hair in its natural state or on wet hair that’s been straightened or stretched. Wet cutting curly hair produces unpredictable results because curl shrinkage is impossible to anticipate accurately while the hair is wet and extended. Dry cutting — also called the DevaCut or curly cut method — allows the stylist to see exactly how each curl forms, how much it shrinks, and where weight needs to be removed to achieve the intended result.
The right layered curly cut removes weight from the mid-lengths and ends that would otherwise drag the roots flat and force the curls into the triangular, bottom-heavy shape that most curly-haired people spend years trying to escape. With that weight removed, the roots spring upward and the curls take their natural, rounded shape.
Best for: All curl types from loose wavy (2a-2c) to tight coils (4a-4c). The layer placement and the amount of layering are adjusted for different curl types — looser waves need conservative layering to preserve density, tighter curls can handle more aggressive layering.
What to ask your stylist for: “A dry curly cut with layers designed for my specific curl pattern.” If your current stylist doesn’t offer dry cutting for curly hair, seek a specialist. The quality difference is not subtle.
Styling tip: The LOC method is the gold standard for maintaining a layered curly cut: apply a Liquid (leave-in conditioner) first, then an Oil, then a Cream or gel to seal everything in. Scrunch each product in thoroughly without disrupting the curl clumping. Diffuse on low heat, scrunching upward as you go. Once dry, break the gel cast gently with a microfiber towel or a small amount of oil for soft, defined, bouncy curls that showcase every layer at its best.
Maintenance: Every eight to twelve weeks for the layers. Curly hair grows more slowly at the visible length due to curl shrinkage, which means trims are less frequent — but when done, they’re worth investing in a specialist.
12. The Feathered Layer Cut
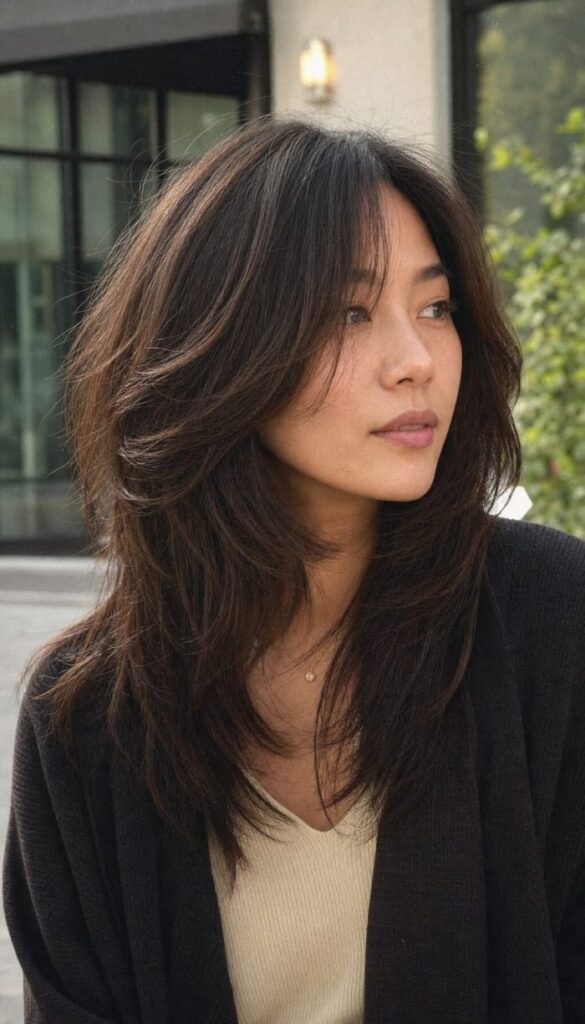
Feathering is a cutting technique that angles each layer’s ends to create soft, wispy tips that catch light and move with extraordinary fluidity — a technique that defines the glamorous, sun-catching hair of 1970s fashion photography and has been continuously refined into something that feels entirely current in its modern execution. The key distinction of modern feathering from its vintage predecessor is precision: contemporary feathered layers have a deliberate, specific quality rather than the somewhat haphazard execution of the original technique.
On medium to long hair, feathered ends create a delicate, almost ethereal movement — the tips flutter and catch light in a way that heavier, blunter ends simply cannot. On fine or medium hair specifically, the visual impression of volume and thickness created by feathered layers moving in light is one of the most effective density illusions available.
Best for: Medium to long hair lengths where the feathered ends have enough length to move visibly. Fine and medium hair textures where the lightness of the technique enhances rather than thins. Not ideal for very thick, coarse hair where feathering can create unwanted frizz at the ends.
What to ask your stylist for: “Feathered ends throughout — I want the tips of each layer to be soft and slightly pointed rather than blunt.” The distinction between feathering and point-cutting is in degree: feathering removes more from each end, creating a more defined wispy quality; point-cutting creates subtle texture. Specify which you want.
Styling tip: A round brush used in a rolling, outward motion during blow-drying creates the signature gently flipping ends of a feathered cut. Medium-hold mousse applied to damp hair before blow-drying gives the feathered tips extra body and definition. For an evening look, a large-barrel curling iron creates soft, sweeping waves where the feathered ends become even more dramatically visible — finishing with flexible hairspray holds the movement without stiffness.
Maintenance: Every six to eight weeks. Feathered ends lose their wispy quality as they grow, transitioning gradually back toward bluntness, which is when the cut needs refreshing.
13. The Layered Shoulder-Length Cut
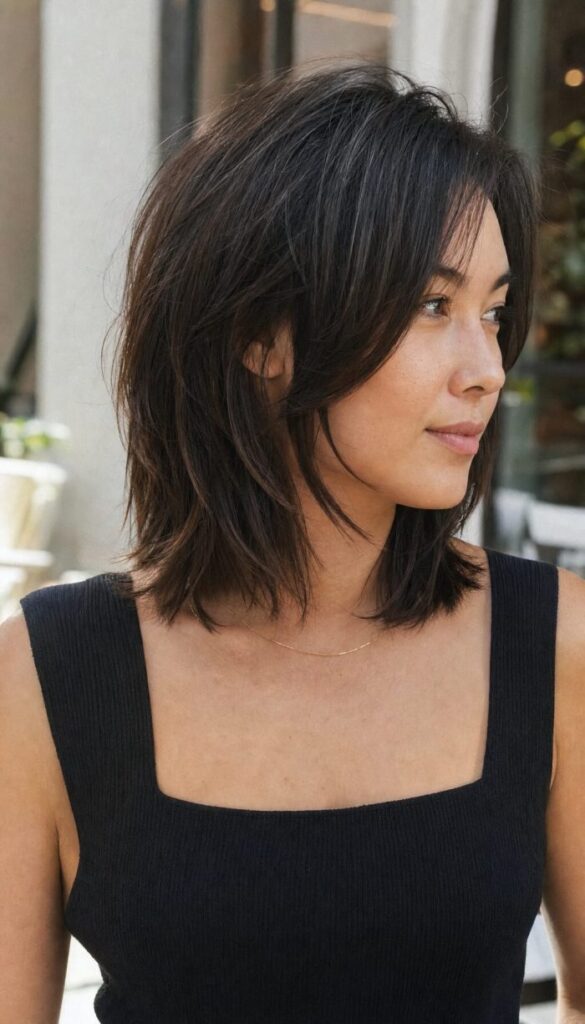
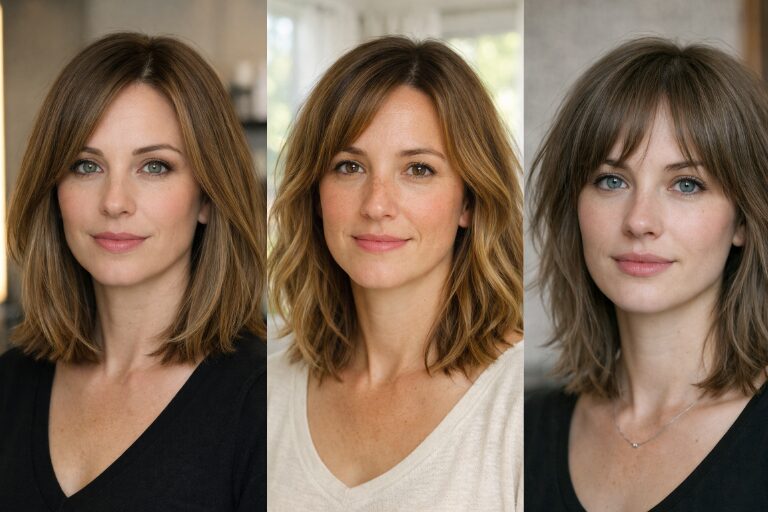
Shoulder length occupies a consistently rewarding position in the cut landscape — long enough to offer meaningful styling versatility, short enough to hold its shape and maintain the movement that layering creates. At this specific length, layers have the ideal amount of space: enough to flow and graduate naturally from crown through mid-lengths to ends, creating a balanced, elegant structure that feels complete rather than transitional.
The shoulder-length layered cut is also one of the most forgiving at every growth stage. As it grows toward a longer lob, the layers stretch with it naturally. As it’s freshly trimmed back to shoulder length, the layers snap back into their most defined expression. It’s genuinely difficult to have a bad hair period with a well-executed shoulder-length layered cut.
Best for: Every face shape and almost every hair type. The one adaptation needed is for very fine hair, where conservative layering preserves the perimeter density that fine hair needs at this length to avoid looking thin at the ends.
What to ask your stylist for: “Shoulder-length cut with layers flowing from the crown through the mid-lengths to the ends — I want it to look full and have natural movement.” Specify whether you want the layers to be more subtle (gradual graduation) or more defined (visible movement between layers) based on your styling preference.
Styling tip: A medium round brush blow-dry with a gentle inward bend at the ends creates the classic, elegant finish. For evening, a 1.25-inch curling iron creates loose S-waves that show the layer variation as beautiful natural undulation through the lengths. To transition from a full blow-dry to an evening look, simply remove any clips, shake the hair, and apply a small amount of shine serum to the mid-lengths for instant luminosity.
Maintenance: Every six to eight weeks — one of the most time-efficient cuts on this list relative to how consistently good it looks.
14. The Textured Fringe with Long Layers
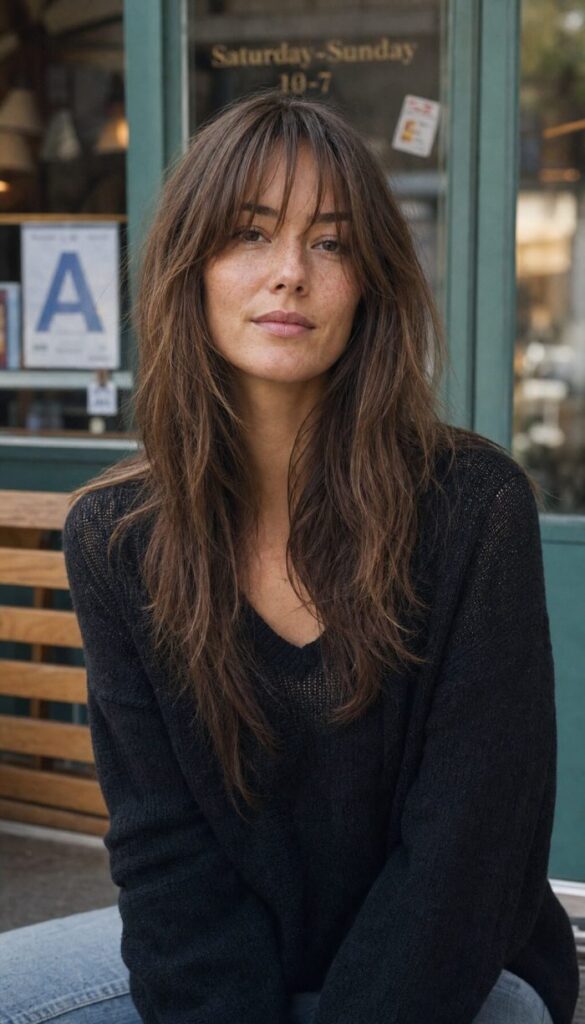
The textured fringe is the more accessible, less maintenance-intensive version of the classic heavy fringe — and when paired with long, flowing layers, it creates one of the most personality-rich combinations available. Unlike a blunt, uniform fringe, the textured version has slightly irregular, piece-y ends that create a softer, more organic quality. This irregularity isn’t imprecision — it’s deliberately cut through point-cutting to produce ends that separate naturally and catch light individually rather than as a solid curtain.
The long layers that accompany the textured fringe begin just below the cheekbones and cascade through the full length of the hair, creating a unified framing system where the fringe and the face-framing layers feel like parts of the same continuous story rather than separate elements.
Best for: Most hair textures. The textured fringe specifically works better on fine to medium hair than a heavy blunt fringe, as the reduced density of the textured cut means less overall weight at the hairline — which is where fine hair is often most delicate.
What to ask your stylist for: “A textured fringe with slightly irregular, piece-y ends — not blunt, not super wispy, but with visible individual tips. Paired with long face-framing layers that blend into the rest of the length.” Bring a reference photo if possible — “textured fringe” covers a wide range from barely-there to quite choppy.
Styling tip: Blow-dry the fringe forward with a small round brush, then use a flat iron to create slight, irregular bends — not perfectly straight, not curled, just gently imperfect. This is what creates the contemporary, editorial quality of a textured fringe versus a blown-out fringe. A tiny amount of wax or light pomade on fingertips, lightly pressed through the fringe ends, defines the individual pieces and prevents the textured quality from going flat through the day.
Maintenance: Every four to six weeks for the fringe specifically. The long layers can go eight to ten weeks.
15. The Layered Blowout Cut
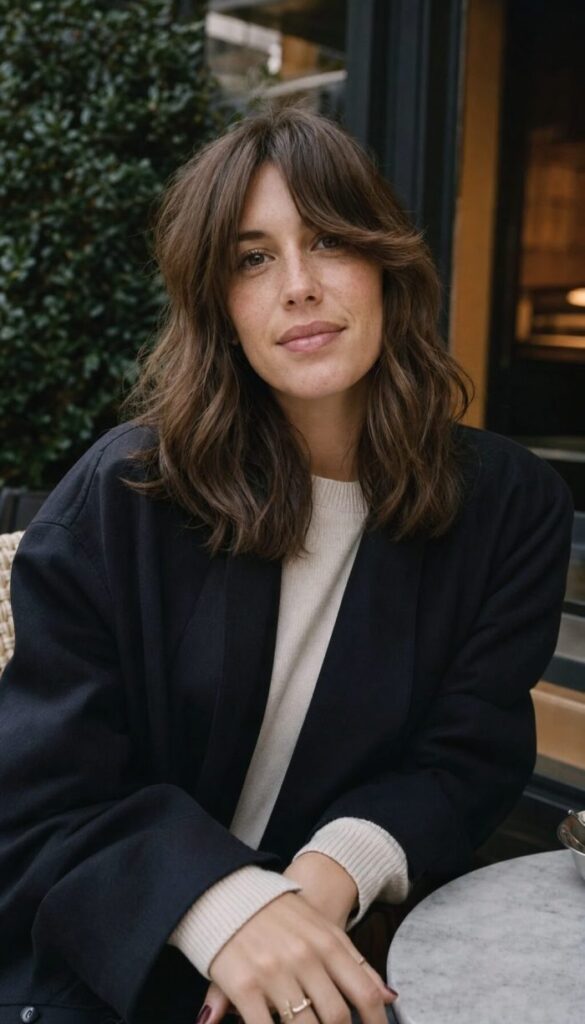
The layered blowout cut is designed around a specific output: maximum volume and glamour that holds through the day without constant restyling. Every decision in this cut — where the layers start, how long they are, how they’re graduated — is made with the blow-dry result in mind. The layers are positioned to be activated by heat and a round brush: each layer lifts away from the head during blow-drying and sets in a position that creates the full, bouncy, high-volume silhouette that makes this style so consistently spectacular.
The practical implication is that this cut looks best when blown out rather than air-dried. For women who love a blowout and do them regularly, the layered blowout cut transforms the process — the hair seems to dry into its perfect shape almost automatically when the right technique is applied. For women who primarily air-dry, a different cut philosophy would serve better.
Best for: Fine to medium hair that wants to create the impression of significantly thicker, more voluminous hair. The internal structure of the blowout cut holds volume better than most cuts at this goal. Straight and wavy textures respond most dramatically.
What to ask your stylist for: “Layers specifically designed to hold a blowout — I want maximum volume and movement that doesn’t deflate through the day.” Some stylists call this a “volume cut” or a “blowout haircut” — the terminology may vary but the intention is the same.
Styling tip: A volumizing mousse applied generously to damp hair is the essential foundation. Blow-dry in sections with a large round brush, rolling upward and away from the scalp at the roots for maximum lift, and cool each section with a blast of cold air before releasing the brush. Setting the finished blowout in large velcro rollers for 10 minutes while the hair cools completely can extend the style by an additional day or two — a simple technique that makes a dramatic difference.
Maintenance: Every six to eight weeks. The blowout cut grows out relatively gracefully since its layering is designed to look full rather than textured — minor growth doesn’t immediately disrupt the effect.
16. The Layered Wavy Lob
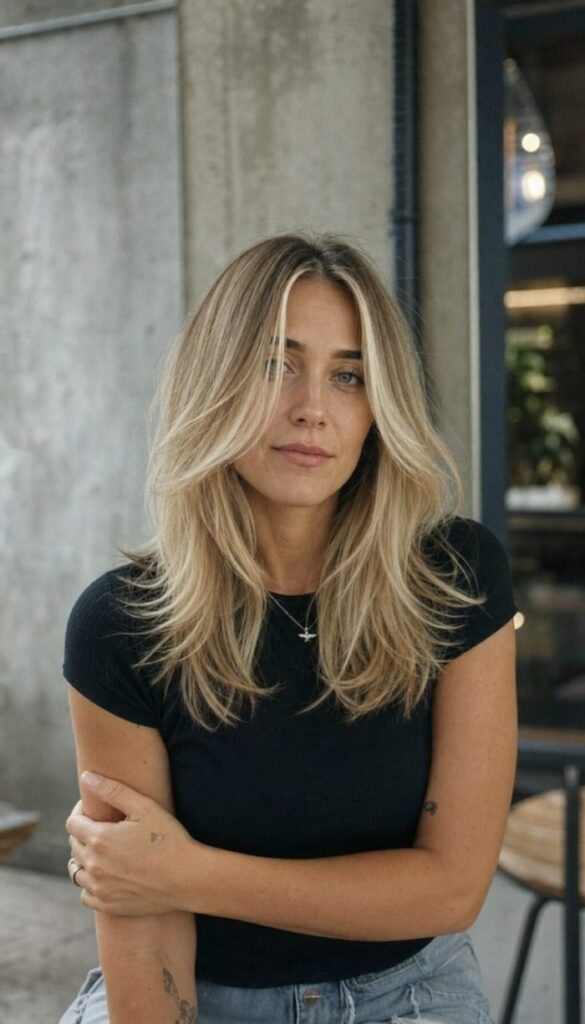
The layered wavy lob is the cut that understands what wavy hair actually wants and works entirely in harmony with that want. Most wavy hair is neither straight enough to look intentional when blow-dried smooth nor curly enough to be styled with curl-specific products — it occupies a middle territory that many cuts fight rather than celebrate. The layered wavy lob, designed specifically for the wave pattern rather than imposed upon it, creates a structure where each wave has room to form its own distinct, beautiful shape at a length that keeps the overall silhouette modern and manageable.
The lob length — falling between the chin and the collarbone — is the ideal canvas for wavy layers because it gives the waves enough length to fully develop while keeping the weight in a zone where the waves can hold themselves upright rather than collapsing from their own mass.
Best for: Naturally wavy (2a-3a) hair textures where the layering can work with the existing wave pattern. Works beautifully for those who want to enhance natural wave or create convincing waves through styling. Not the best choice for hair that’s genuinely straight and resistant to waving.
What to ask your stylist for: “Layers cut to work with my natural wave pattern — I want each wave to have its own shape.” If possible, ask your stylist to assess your hair in its natural, wave-dry state before cutting. The conversation about where the layers should sit is most productive when both you and your stylist can see the wave pattern clearly.
Styling tip: Wave-enhancing cream applied to soaking-wet hair, followed by scrunching and air-drying, produces the most natural-looking wave result. For a more defined finish, a 1-inch curling wand creating loose ringlets that are immediately broken apart with fingers while still warm creates beautiful, dimensional waves. A light-hold curl cream or wave spray refreshes the style on day two without heat.
Maintenance: Every eight to ten weeks. Wavy hair shows layered cuts particularly beautifully as they grow, which means the grow-out period is genuinely attractive rather than awkward.
17. The Micro Layer Cut
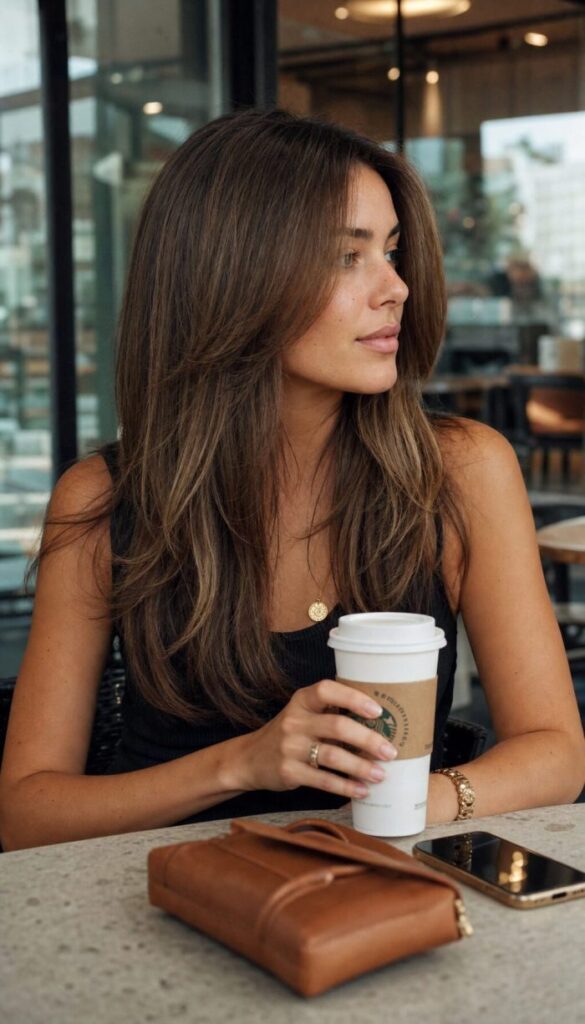
Micro layers are the most invisible form of layering available — a technique where extremely fine, graduated layers are cut in very small increments throughout the hair, creating texture and movement that is felt in how the hair behaves rather than seen in any obvious visual variation at the surface. The outer silhouette looks virtually untouched. The hair moves completely differently.
This technique is the ideal entry point for anyone who wants the benefits of layering without the commitment to a visibly layered look — and it’s the best solution for growing out previous layers, since micro layers can blend old and new growth seamlessly while still providing the movement and dimension that makes layered hair so appealing.
Best for: Fine or thin hair where the goal is movement and volume without any reduction of surface weight. Also ideal for women in the layering “try” phase who aren’t yet certain they want a more dramatic layered result.
What to ask your stylist for: “Micro or invisible layers — I want movement without any visible layering.” Some stylists call this “graduation” rather than “layers” — both terms describe the same fine internal structure. Be clear that you want the outer silhouette to look clean and untouched.
Styling tip: A root-lifting spray applied directly to the roots before blow-drying maximizes the subtle volume that micro layers create. A medium round brush through the lengths, with a lightweight shine spray rather than a heavy serum as a finish, activates the layers without weighing them down. A large-barrel curling iron on dry hair creates just enough movement to make the micro layers visible — the slight imperfection in the wave formation is the micro layers doing their work.
Maintenance: Every eight to ten weeks. Micro layers are the most forgiving of all layering types between appointments.
18. The Layered Pob (Pixie Lob)
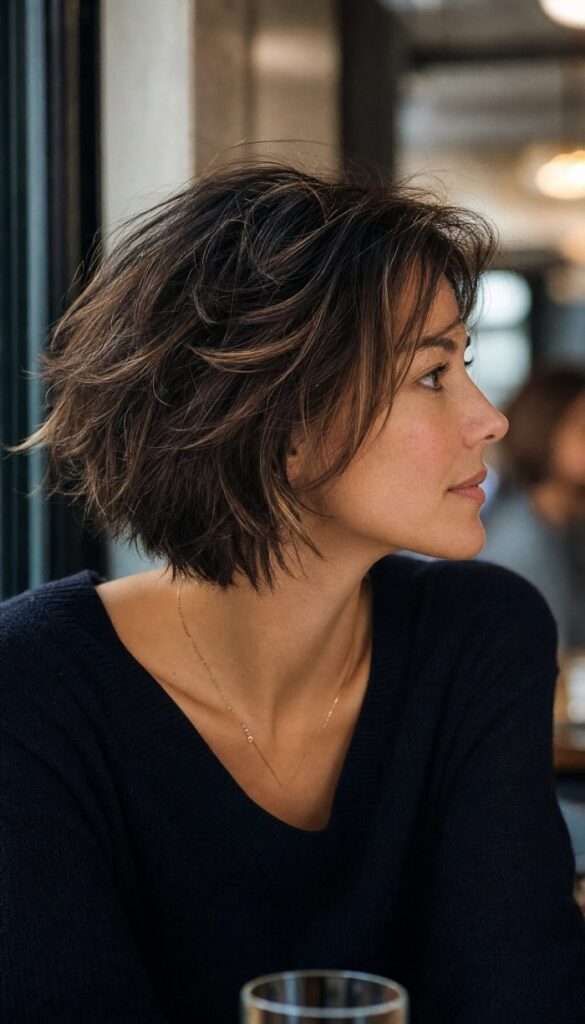
The pob — pixie lob — occupies the genuinely fascinating territory between a pixie cut and a traditional lob, and in its layered form becomes one of the most dynamic short-to-medium haircuts available. The sides and back have the closeness and precision of a pixie; the top and front retain enough length to create significant layering and movement. The result is a cut that offers the low-maintenance, high-impact nature of short hair combined with the expressive versatility of length on top.
The layered pob also solves one of the most common short-hair frustrations: the flat, one-dimensional crown that makes some pixie variations look static and without personality. The extra length on top provides the raw material for layering that creates movement, texture, and the ability to style in multiple directions.
Best for: Most hair types. The layered pob is more adaptable than a traditional pixie because the extra length on top provides more styling options and is more forgiving of texture variation. Particularly flattering for oval, heart, and long face shapes.
What to ask your stylist for: “A pob with layering through the top — I want the sides and back close but the top to have real movement and texture.” The key specification is the length relationship between the top and sides — the greater the difference, the more dramatic the pob. Bring reference photos showing both a longer and shorter interpretation so your stylist can calibrate exactly where on the spectrum you want to land.
Styling tip: A volumizing cream applied to damp hair at the top, blow-dried forward and slightly to one side, creates the modern asymmetric styling that suits the pob beautifully. A small flat iron used to create alternating shallow bends through the longer top layers produces the textured, piece-y quality that makes the layering most visible. For a sleeker version, a fine-tooth comb and light pomade smooths the layers for a more sculpted, sophisticated finish.
Maintenance: Every four to six weeks for the sides and back. The top grows more slowly at the visible length and can often go eight weeks.
19. The Layered Mane with Curtain Bangs
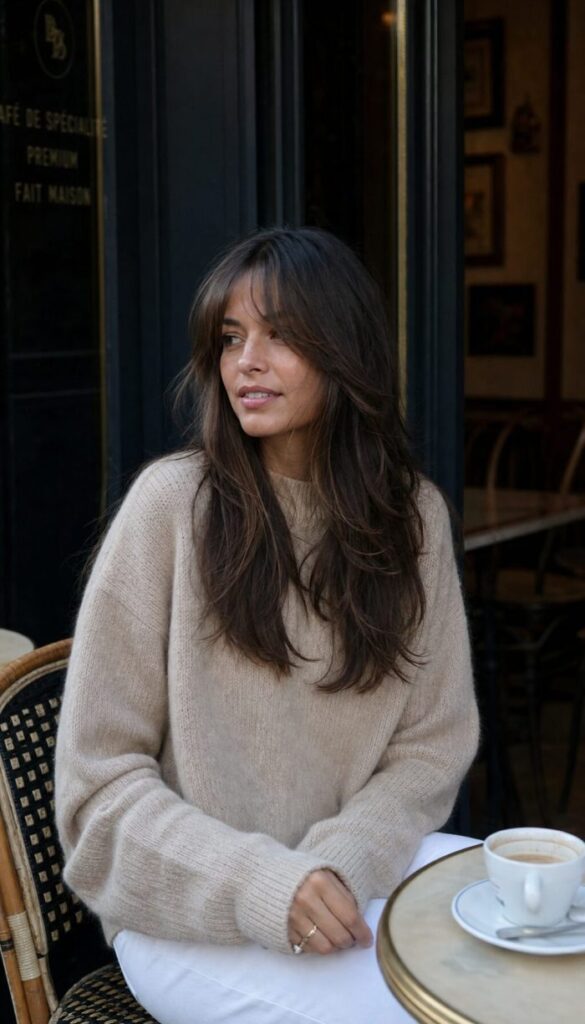
The layered mane with curtain bangs is the most dramatically glamorous entry on this list — a full, flowing long style that combines heavily layered lengths with perfectly executed curtain bangs to create something that reads as genuinely cinematic. The layering begins at the crown and cascades through the entire length in long, sweeping sections that create a mane-like fullness and movement. The curtain bangs add the face-framing focal point that transforms the flowing lengths from beautiful backdrop to complete, starring-role hairstyle.
This is unapologetically a high-investment style — it rewards consistent styling attention with results that are genuinely spectacular. For women who are willing to spend time with a good blowout and curling wand, it delivers the most visually impactful result of any cut on this list.
Best for: Medium to thick hair density with straight to wavy texture, where the heavy layering and the curtain bang combination can be fully realized. Not ideal for very fine hair, where heavy layering at long lengths can create see-through ends.
What to ask your stylist for: “Heavy, sweeping layers throughout the full length starting at the crown, with curtain bangs that transition naturally into the face-framing layers.” The continuity between the bangs and the face-framing layers is what makes this combination most spectacular — they should feel like one unified system.
Styling tip: Style the curtain bangs first — always — using a small round brush to pull each side outward and slightly downward from the center part. Then work through the rest of the hair in large sections with a 1.5-inch curling wand, creating loose, sweeping waves that follow the layer direction. A generous amount of lightweight hair oil pressed through the palms and worked through the mid-lengths and ends enhances the dimensional separation between layers while adding the glossy richness that makes this style most spectacular. Flexible hairspray as a final light mist holds the style without eliminating the movement.
Maintenance: Every eight to twelve weeks for the lengths. The curtain bangs every four to six weeks.
Choosing the Right Layered Cut for Your Hair Type
Understanding how different layering approaches interact with different hair types makes every salon appointment more productive. Here’s the key guidance:
Fine or thin hair benefits most from invisible interior layers, micro layers, and the lob with invisible layers. The priority is always preserving perimeter density — the ends need to look full. Aggressive or heavy layering removes the weight that fine hair relies on for its visual fullness. Avoid: the full shag, very heavy wolf cuts, and any technique that involves significant interior thinning.
Thick or coarse hair is the most versatile category and can handle the most dramatic layering approaches. The shag, the wolf cut, and heavy cascading layers all perform beautifully on thick hair, removing the bulk that would otherwise make length feel heavy and unmovable. The challenge for thick hair is usually not creating volume but managing it — layers should be placed to guide the hair into the intended silhouette rather than simply reducing overall weight randomly.
Naturally wavy hair benefits enormously from layering that works with the wave pattern rather than against it. The layered wavy lob, the butterfly cut, and the shag are particularly strong choices. For wavy hair specifically, dry cutting is worth requesting — it produces dramatically more accurate results than wet cutting.
Curly hair needs a specialist. The technical demands of cutting curly hair in its dry, natural state to achieve the intended result are significant, and the difference between a skilled curly hair specialist and a general stylist working on curly hair is very often the difference between a transformative result and a disappointing one. The layered curly cut in particular requires this expertise.
Straight hair has the most flexibility in terms of cut choice, but benefits most from layering that creates movement through styling rather than relying on natural texture to do the work. The layered blowout cut, the cascading long layer, and the textured bob are particularly well-suited.
Pin it to find it later!
Final Thoughts
Modern layered haircuts are not a category of trend — they’re an approach to haircut architecture that works across time, across hair types, and across personal aesthetics because they address the fundamental challenge of making hair move and behave beautifully in whatever way suits its natural character. Whether that means invisible interior layering that creates volume without any visible texture, dramatic wolf-cut graduation that celebrates bold, expressive styling, or the romantic sweep of a heavily layered mane — the principle is the same. The cut creates the conditions for the hair to be its best self, and the styling follows naturally from there.
Find the version on this list that genuinely excites you. Bring reference photos that show not just the overall shape but the specific texture quality, the movement style, and the finish you’re drawn to. Have an honest conversation with your stylist about your actual styling routine and your hair’s natural behavior. And then trust the process — a genuinely well-executed layered haircut is one of those rare investments that pays dividends every single morning.
Save your favorites and bring them to your next appointment — your stylist will appreciate the clarity of a well-chosen reference image.
What is the difference between a wolf cut and a shag haircut?
Both feature heavy layering and a lived-in, textured aesthetic, but the key structural difference is how and where the layers are distributed. The shag layers consistently throughout the entire length from crown to ends, creating a relatively even distribution of texture. The wolf cut concentrates dramatic volume and shorter layers specifically at the crown, then transitions into longer, wilder lengths at the back and sides — creating a more pronounced volume differential that reads as edgier and more dramatic. The shag leans retro-bohemian; the wolf cut leans contemporary-rock.
Which layered cut is best for fine or thin hair?
The lob with invisible layers and the micro layer cut are the two strongest choices for fine hair because both create movement and dimension while specifically preserving the perimeter density that fine hair needs to look full at the ends. The butterfly cut is also a strong option — its shorter face-framing layers draw attention upward and create perceived volume. Very heavy layering throughout (the full shag, aggressive wolf cuts) should be approached cautiously on fine hair, as removing too much interior weight can make ends look sparse.
How often do layered haircuts need to be trimmed?
Short structured styles (layered pixie, pob): every four to six weeks. Medium styles (textured bob, collarbone cut, lob): every six to eight weeks. Longer styles (cascading long layers, butterfly cut, layered mane): every eight to twelve weeks, though fringe and face-framing pieces may need attention every four to six weeks. The general principle is that more structured, shorter cuts grow out more visibly and need more frequent maintenance.
Can layered haircuts work on curly or wavy hair?
Not only can they work — they often produce the most spectacular results on curly and wavy hair specifically. Layers on textured hair remove the weight that forces curl patterns into unflattering, heavy shapes and allow the roots to spring upward and the natural texture to fully develop. The critical factor is finding a stylist who cuts curly and wavy hair in its dry, natural state. Wet cutting textured hair produces far less predictable results because of how dramatically curly hair shrinks and changes shape when dry.
What is balayage and why does it work so well with layered cuts?
Balayage is a freehand hair coloring technique where color is painted onto the hair in sweeping sections to create soft, natural-looking tonal variation — lighter at the surface and tips, deeper at the roots and interior — without the uniform striping of traditional foil highlights. It pairs exceptionally with layered cuts because the cut’s movement reveals the color at different angles simultaneously, making the tonal variation more dynamic and visible than it would be in the same color on a non-layered cut. The layers activate the balayage; the balayage amplifies the layers.
What’s the difference between curtain bangs and face-framing layers?
Curtain bangs are a specific fringe style that parts at the center and sweeps to each side, typically falling between the brow and cheekbone. Face-framing layers are longer graduated sections cut around the face’s perimeter that frame and accentuate the features. The two elements work in complementary ways — curtain bangs create the upper frame, face-framing layers extend that framing further down through the cheekbones and jaw. The curtain fringe with face-framing layers style combines both, creating a complete, unified framing system that flatters most face shapes.
Which layered cut requires the least daily styling?
The lob with invisible layers and the layered collarbone cut are the most reliable low-maintenance choices — both look polished when air-dried and require minimal product or heat styling. For naturally wavy or textured hair, the shag and wolf cut are surprisingly low-maintenance because their intentionally tousled aesthetic looks better with minimal intervention. The layered blowout cut is specifically high-maintenance by design; the micro layer cut and invisible layers are low-maintenance by design.